Out of curiosity, have you tried another supported model format?
Unfortunately, Maya LT can only export FBX files.
Load it up in Blender and try exporting there?
Tried importing the fbx into blender and then exporting as both FBX or DAE. I have tried building both in the pipeline tool with fbx importer and open asset importer. Still not able to find the skeleton.
Try more formats, or explore the model in blender, is it there?
I ended up bypassing monogames loader and directly load thru assimp to my own model class. Other people have done the same.
Id look up Nkasts aether extras he put in a lot of time on his model stuff and i think he is still working on it from time to time. https://github.com/tainicom/Aether.Extras/tree/2fbb8bb6dfaf35c761ca9f1008018ea097739f43
searching for modeling you should get a huge list of posts. http://community.monogame.net/search?q=skinned%20example
One day eventually ill pick up my own model loader again and refine it. Mine typically loads the maya fbx but with bad scaling and the assimp nuget stuck in it is like a year old.
Still there is tons of notes.
my own git hub project which is collecting dust
Ok, I got past a lot of my initial issues by renaming my root bone to “root”. I am still hitting roadblocks, but am at least making progress now.
I have a much more complex model that I am trying to get in, and just in case anyone in the future sees this, here are some issues I solved:
- As stated above, made sure the root bone was named “root” and that got me past it not finding the skeleton.
- My entire animation is animated using controls and constraints. I needed to select my root bone in Maya and while in the Animation menu, do Key > Bake Simulation which will bake the anims to the joints themselves. (Prob don’t want to do this permanently to your file, but just before export)
My character is made up of several meshes and this got the head and head gear in and animating, but for some reason the body is nowhere to be seen. Still, lots of progress!
EDIT: Ok, the body not importing was somewhat silly. That fixed itself by a standard Maya Delete All Non-Deformer History
@willmotil By the way, I tried out your RiggedModelLoader and it worked very well (perfect for body & eyes and most of the head) but I noticed the hair mesh and neck bottom for the head are stretched. I just started looking into it. My first guess is it has something to do with the first bone applied to each skinned mesh and the offset. Seems like it would be something simple like that. Here’s a comparison of the 3DS rig and the import so far:
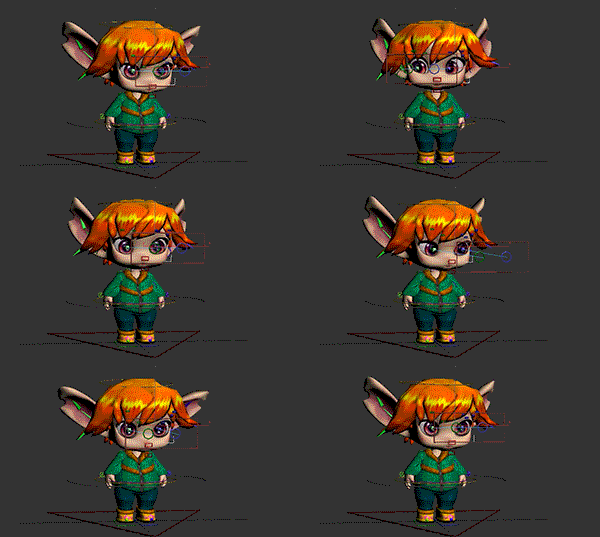
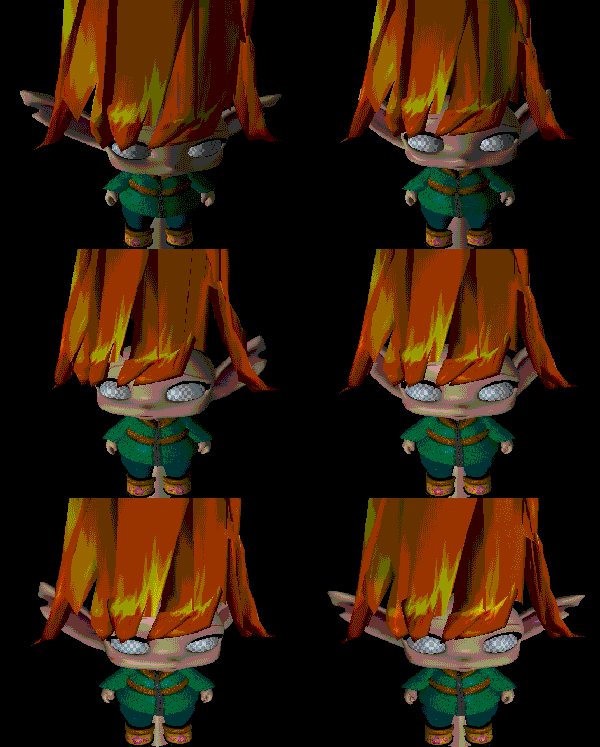
It’s a more complex rig than others I tried with SkinnedMesh and so it wouldn’t even try to convert it and I thought it has something to do with the root but I could be wrong.
On the plus side I was excited to see yours works well aside from the issue of first-bone offset (I’m assuming).
I’ll look into it more - just wanted to see if you or anyone had any suspicions as to what might cause this?
Well that’s unexpected i know i had scaling inconsistency’s for a whole model but not individual parts. I haven’t actually seen that till now i thought i had long ago straightened all that out.
If you want to send me a link to the model, ill load it up and take a look.
.
.
Nkasts will honestly probably work straight up.
I still would like to take a look at it and see whats going on with that stretching.
My little prototype here does output a lot of debug info if you start flipping the bools on in the loader and a little in terms of visual shader debuging.
Ok cool. File can be found here:
http://www.alienscribbleinteractive.com/kid_idle_fbx.rar
Yah, I just checked out NKasts - it is pretty awesome - pipeline and everything setup.
I’ve started trying to mimic the Open3mod recently to see what results I get (mostly out of interest). I like the FBX assets setup since I do want users to be able to switch or modify fbx files to their liking. If I get yours working completely that would be great as well.
I find myself a bit confused as I found on the net, some mixed messages about matrices needing to be transposed and some saying they don’t need to be. I’m wondering if I can just do a straight conversion like the Assimp2OpenTK matrix converter does or would need to transpose the result?
Ok cool. File can be found here:
http://www.alienscribbleinteractive.com/kid_idle_fbx.rar
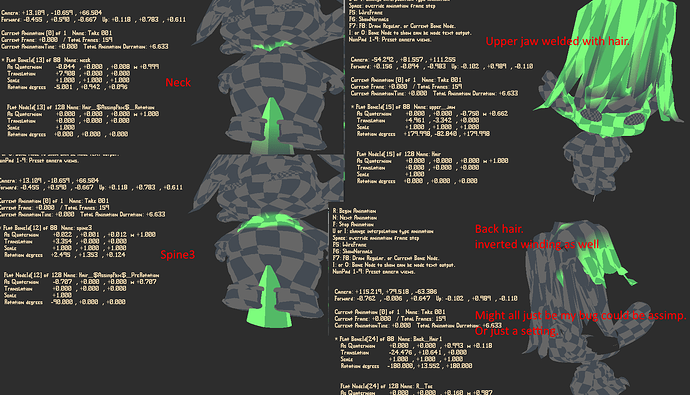
Ah just took a look at it… there is actually lots of stuff wrong with how it loaded the model. It seems to start at spine3 bone node. Or possibly one of the regular nodes before that.
It could just be a setting that’s actually probably what it is. Im gonna take a look at it tonight though see if i can’t get it too work.
Yah, I just checked out NKasts - it is pretty awesome - pipeline and everything setup.
Yep he dedicated quite a bit of time to it much more then i did.
I’ve started trying to mimic the Open3mod recently to see what results I get (mostly out of interest).
Ya i checked it out when i started but to be honest it wasn’t as much help as just reading the assimp docs.
I like the FBX assets setup since I do want users to be able to switch or modify fbx files to their liking.
If I get yours working completely that would be great as well.
More then welcome, ya that’s partially why i started this really maybe even a little more ambitious but not all the pieces are ready yet. I suppose maybe ill start cleaning up a bit it really is a mess.
I find myself a bit confused as I found on the net, some mixed messages about matrices needing to be transposed and some saying they don’t need to be.
I’m wondering if I can just do a straight conversion like the Assimp2OpenTK matrix converter does or would need to transpose the result?
Well the animation matrices scale translation all get transposed, for mg you have to convert the assimp quaternions as well if i remember and some other stuff.
Its pretty much all at the bottom of that loader class though in extensions. You can just highlight each and find all references to see what gets transposed or converted.
That class is really just all the conversion extensions just wanted everything to do with the loader for assimp in one spot i know its all over bloated and ugly but kinda do that on purpose to force myself to eventually come back to it.
Oh ya i totally forget to tell you… hit project > properties > application tab on the left > look for the drop down for output and select console. You can get a ton of debug info when you run anything that loads from the full animation key dump to all the bones and all the nodes meshes and all kinds of stuff.
Let me know if you try it in nkasts and it works pretty sure that’s a bug in my code.
Thanks for the feedback! 
Yah, I’m thinking the same - seems like after spine3 but only for start of mesh2 [bottom of head(neck)] and vertices influenced by upper-jaw (again - first bone to influence start of hair) but I haven’t figure out why so far. Btw - the upper-jaw actually is supposed to influence most of the hair & head - sort of using it as the true head bone.
I notice spine3 is working ok for the upper part of mesh1(body) - just not the neck (and that loop on the neck is only supposed to be influenced by spine3) - so I’m guessing the other bone influences are fixing the problem well enough not to notice usually or something strange in the transform for the first bones of each mesh?
I did notice I could load it into the assimp viewer. I can only guess that there may be something not accounted for in the calculation somewhere.
I’m interested to find some time to look over it - now that I know a bit more about how the code is working - I may be able to figure it out. 
Im actually looking it over now and im adding more visual tests so i can try to see exactly whats happening. My first couple versions had visual bone and mesh displays for individual bones dunno why i removed all that but i seem to have actually thrown it all out. So right now im re-writing it all.
I did notice I could load it into the assimp viewer. I can only guess that there may be something not accounted for in the calculation somewhere.
Ya i tried it in the assimp viewer last night and it worked perfectly unfortunately the .net nuget is like a year old so im hoping it is something with my code here.
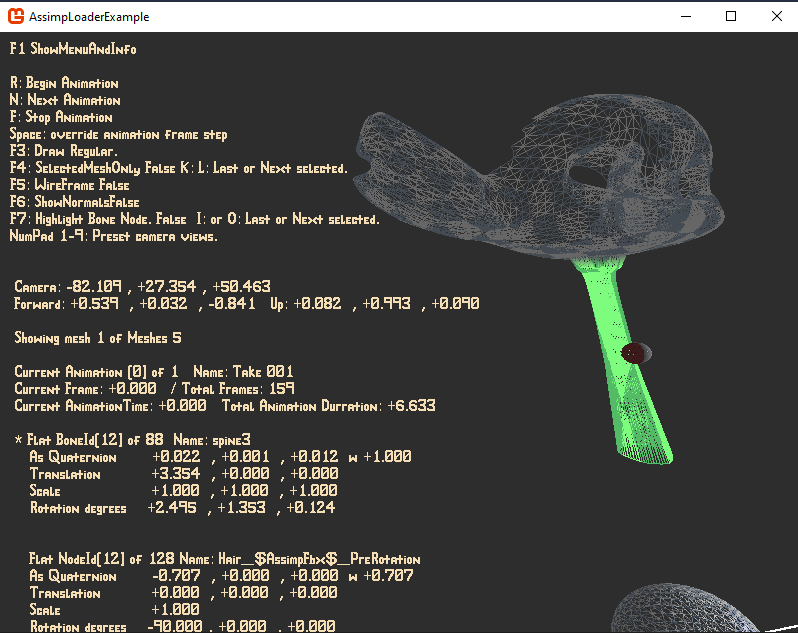
Mesh1 and Spine3 together appear to have a cone segment attached which appears to me to be a bone visualization in the model editing program this annoys me the most cause it looks like something assimp should have purged on import. Spine3 here is also the neck area of mesh 0.
Ill post back soon as i get this visual debuging stuff re-written that way i can see the exact node chain transform were these messed up parts are to were they are not.
Should be able to at least visually identify what the problem is then exactly.
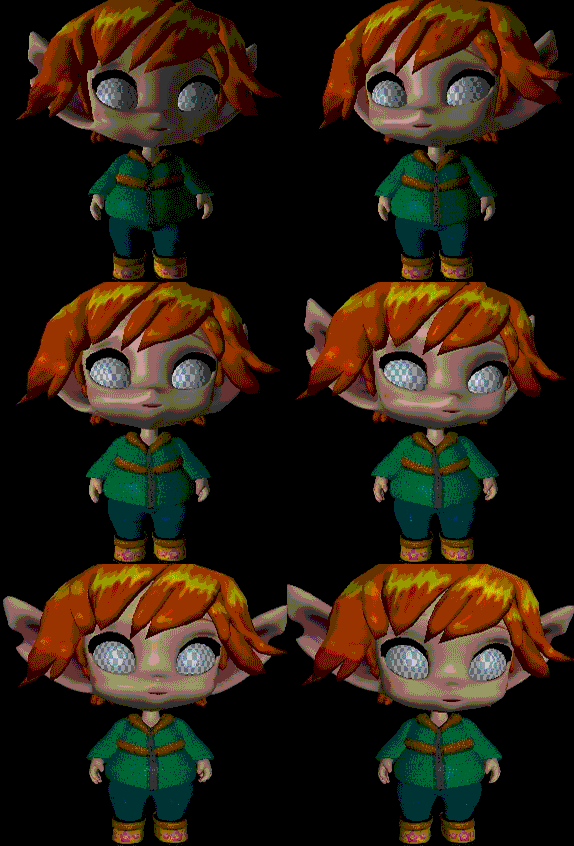
So, I found a way to use skinwrap to export the entire model in a way that works perfectly in your RiggedLoader
and it looks perfect (aside from setting up the alpha material). It seems only multi-skin-mesh when not combined will cause problems at the moment - but at least there’s a reasonably easy work-around. Maybe I’ll make a tutorial on how to setup for exports for improved compatibility.
This is what it looks like 
+1 for a tutorial 
Righton, yah, I 'm working on setting one up shortly on my AlienScribble channel. 
Ah i finally solved this in a sane way just today. In a few days ill put the changes up on github.
Nothing on the outside changed except the ability to draw transformations per mesh that i added for someone else. Tons of work in clean up todo still though.
I put this down for a bit because i didn’t know how to tackle it any way that would not just force me to rework the entire data structure assimp hands you.
Basically the problem is that some exported models have multiple inverse bind pose offsets for the same node transform essentially for the same bone but different bind poses to different meshes of that same bone.
This presented a big problem of how to make it work without rebuilding the node tree and being forced to handle each mesh with more work as the chained transforms aren’t cumulative.
However this is not quite true nor was most of the information i found on what the offsets represent which are really themselves … takes a deep breath …
static inverse mesh bind pose matrices per mesh or common across all model meshes to the accumulated transformation parent node which can only be applicable to nodes that themselves represent bones. … yikes…
So i solved this today, very happy as this took quite a bit of time to figure out.
So now i have the original busted model working as well as the secondary squashed exported version.
Still have to clean it up and i badly broke most of my visualization classes to see the bones and stuff to make it work. So it will take a bit to fix it back up then ill make the changes to the github project.
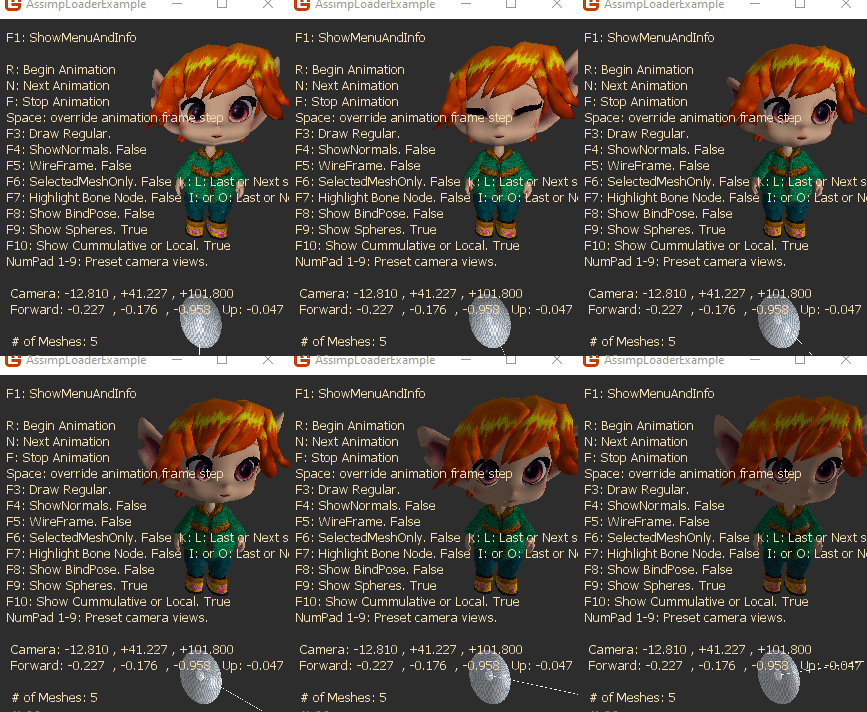
I still have yet to add normal maps and other texture types not sure if i will do that yet as im not sure how to approach it with the same shader or a new one conditionally because there are just so many other types of textures that can be applied to a model.
I may eventually just write a tutorial myself on the assimp intended data structure usage and maybe include code too if i can find the time to really make it look pretty.
this is the jist of what i had to do
        private void UpdateNodes(RiggedModelNode node)
        {
            if (node.parent != null)
                node.CombinedTransformMg = node.LocalTransformMg * node.parent.CombinedTransformMg;
            else
                node.CombinedTransformMg = node.LocalTransformMg;

            for (int i =0; i < node.uniqueMeshBones.Count; i++)
            {
                var nodeBoneToMesh = node.uniqueMeshBones[i];
                meshes[nodeBoneToMesh.meshIndex].globalShaderMatrixs[nodeBoneToMesh.meshBoneIndex] = nodeBoneToMesh.OffsetMatrixMg * node.CombinedTransformMg;
            }

             foreach (RiggedModelNode n in node.children) // call children
                UpdateNodes(n);
        }
and in draw
        public void Draw(GraphicsDevice gd, Matrix world)
        {
            //effect.Parameters["Bones"].SetValue(globalBoneShaderMatrices);
            foreach (RiggedModelMesh m in meshes)
            {
                effect.Parameters["Bones"].SetValue(m.globalShaderMatrixs);
Not insane now but the loader and the references are more complex.
I also added nearly all the data that assimp has to my model class.
so it’s there to be used after the assimp instance is tossed away.
Now if i could think of a way to put even more on the shader like the animation data or somehow put the transforms themselves on it. That would be really cool.
Holy cow - that’s amazing!  So the inverse bind offsets for each individual mesh need to be combined - that’s quite a nightmare to try to wrap my head around. Is it like - individual mesh transforms and them cumulative at connecting joints somehow? Anyway - congratulations on figuring it out
Yah, doing the anims right on shader would be crazy fast. I’ve been wondering about normal maps - or even height maps if I get around to figuring that out. Even normal maps would be really cool. I have normal maps working for my standard object shaders - but I’m not 100% sure if it the lighting is exactly the way it’s supposed to be - altho it does look convincing.
With norm maps I was doing something like this:
VS:
	output.position = mul(position, WorldViewProj);
	output.worldPos = (mul(position, World)).xyz;
	output.uv = input.uv;
	float3 n = normalize(mul(normal,  World)).xyz;
	float3 t = normalize(mul(tangent, World)).xyz;
	t = normalize(t - dot(t, n) * n);                   //orthogonalizes to improve quality
	float3 b = normalize(cross(t, n));
	output.normal   = n;
	output.tangent  = t;
	output.binormal = b;
And then in PS:
    normColor = tex2D(normalSampler, input.uv);
    normColor = (normColor * 2.0f) - 1.0f;       // Expand the range of the normal value from (0, +1) to (-1, +1).
    // Calculate the world-space normal
    bumpNormal = (normColor.x * input.tangent) + (-normColor.y * input.binormal) + (-normColor.z * input.normal);
    bumpNormal = normalize(bumpNormal);          // always normalize

    float3 normal = bumpNormal;
Yah, normal-maps would make it really shine - already I like the lighting. ^-^
So the inverse bind offsets for each individual mesh need to be combined
With the node transform chain, were that accumulates from the root on.
With the cavet that each node in that chain that does represent a bone has
- a inverse bind pose matrix.
- may have more then one inverse bind pose matrice of the same name were each relates to a specific mesh
- if it only has one it applys to all meshes.
- if it has none then its not a bone node so just its transforms need to be concatenated.
- for a model with 5 meshes a node can represent a bone and that node may have 1 2 or 5 inverse bind poses to different meshes for that specific node (1 per mesh) or 1 common to all meshes.
- all the animations frames are nodes that can be considered static and the offsets can be applied to the cummulative transform chain they go thru seperately but still per mesh the proper inverse bind pose bone offsets must be applied before being set to the shader.
ya its a pain in the ass i almost need a picture to explain it.
Ya i think im going to add a separate technique on the shader for a normal mapped mesh at least
(i just really want to see what the eyes look like normal mapped).
When i read in the model if i see a normal type texture ill set a technique to handle it to that mesh and push both texture maps to the shader. At least for the present.
Ill probably also add one for reflection textures too cause i have a model with glass and i really want to do a glass shader to see how the model looks with the glass canopy with the reflection map. I suspect that will also force me to make another change to the order meshes are drawn to handle glass.
Ya my shader normal map is pretty similar to yours assimp gives the bi tangent so i don’t need to calculate it and in that way i can probably get away without re-normalizing them.
My lighting here is not phong or blinn phong its just how i figure it should behave using the actual specular reflection vector and diffuse ambient so you could say its just regular light so that might make it have some larger difference to what you see in max or blender.
.
.
.
The real problem with the extra texture maps is …
-
there is no point in using a shader technique that auto includes a normal map when there isn’t one for a mesh. Or for that matter a bunch of others to boot.
-
like there are at least 6 texture maps that assimp can read in, That is a super fat shader technique to account for all that. The real thing is that there could be any combination of maps so that would be a ton of individual techniques more then would fit on a single shader ill bet so (shaders) to account for all the possibilitys optimally. So then a super fat single technique almost seems more rational.
Im not sure how to choose or deal with that sort of problem like what is the right way?
Thanks for the explanation.
Just as you posted your first post today, I just finished figuring out how to get the consolidated version to work with the regular skinnedMesh thingy. I realized[using MGCB debug mode] I was over MaxBones limit of 72 which might have something to do with Reach compatibility (I’m proly using 120+ most of the time). I modified the ModelProcessor (1 line of code) to accept it, and made a version of SkinnedEffect.fx (with custom eye shading) and SkinnedEffect.cs which would work - and works with the regular model stuff which I thought would be good for tutorials.
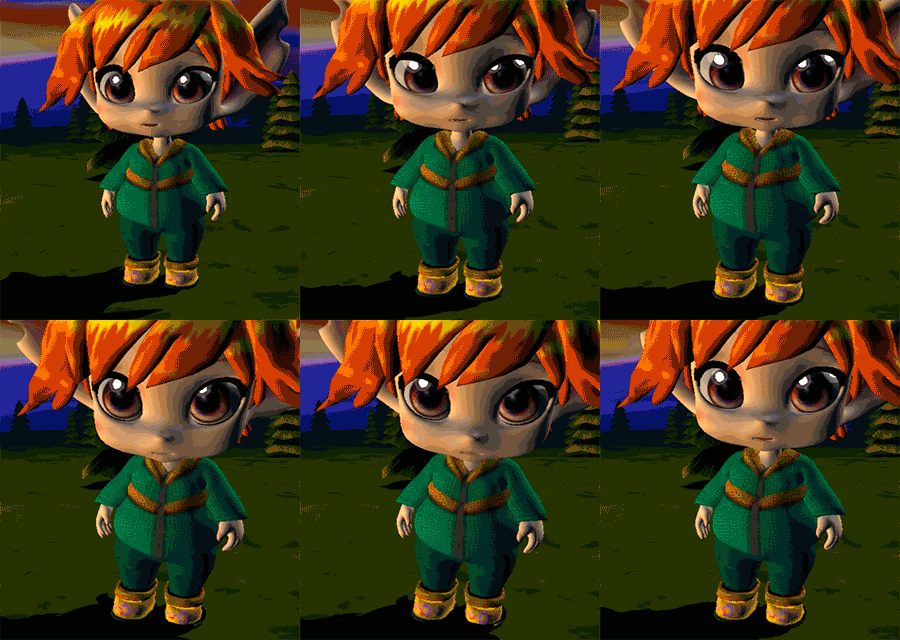
In the mean time, I really love the idea of allowing users to put their own FBX files into a game and this version is very resilient. Normal maps would be really cool. It’d look just like the 3ds version.
In my class I pick the best technique based on settings (like if material alpha is low, I assume it’s a glass-like thingy and so pick a technique and crank up the shine amplifier) - I guess I prefer more techniques to specialize and try to group. So far I don’t sort the see-through stuff - just draw it last. Eventually I’ll have to sort it I suppose.
I guess some circumstances would call for a beast of a technique too. The optimizer is aggressive enough - I’m thinking it probably wouldn’t hurt to set aside common calculation functions as needed and call those from each technique combination.
I’m not sure what is the right way - but this is what I’m kinda doing so far.
