How to make lightsources (torch, fire, campfire etc) in dark area? (2D pixel game)

You can either pass it to spriteBatch.Begin or set it in the GraphicsDevice directly. If you set it through spritebatch the older blendstate isn’t automatically restored when ending the batch, so IMO it’s clearer to set it in GD directly

1 Like

its that easy, huh?

I almost feel like doing it just to do it… maybe I should add it to my grinder game for the 3rd level… Which was going to be a night level anyway… :slight_smile:

2 Likes

ok, so in my test, I cant get this approach to work.

Can you remember the recipe? Otherwise, I’ll have to try and find a tutorial…

1 Like

If the light in the textures uses alpha (i.e. alpha=0 where there’s no light and not zero where there is) you can use

// this rendertarget will hold a black rectangle that gets masked with alphaMask
darkness = new RenderTarget2D(GraphicsDevice, 800, 600);

// the stuff we mask out of darkness, essentially this texture defines our lights
alphaMask = Content.Load<Texture2D>("AlphaMask");

// prepare the darkness
GraphicsDevice.SetRenderTarget(darkness);
GraphicsDevice.Clear(new Color(0 ,0 ,0 ,120)); // the 120 here is the darkness "intensity"

// create the blend state; THIS IS THE IMPORTANT PART
// we say we want to subtract alpha of the source (mask) from the destination (darkness) alpha!
// and make sure we have the full alpha values for both with the Blend.One values
// (AlphaSourceBlend is set to Blend.One by default, but it's nice to do this explicitly for clarity as it
// shows what's interesting in your custom blendstate. If you check out the XNA docs on BlendState, note that the 
// default values they mention there are wrong!)
var blend = new BlendState
{
    AlphaBlendFunction = BlendFunction.ReverseSubtract,
    AlphaSourceBlend = Blend.One,
    AlphaDestinationBlend = Blend.One,
};

spriteBatch.Begin(blendState: blend);
spriteBatch.Draw(alphaMask, darkness.Bounds, Color.White);
spriteBatch.End();

// set the render target back to the backbuffer
GraphicsDevice.SetRenderTarget(null);
// Clear it
GraphicsDevice.Clear(Color.CornflowerBlue);
spriteBatch.Begin();
// draw the masked darkness!
spriteBatch.Draw(darkness, Vector2.Zero, Color.White);
spriteBatch.End();

The texture looked like this:

with white being transparent here, but you can’t see that here. The black is 255, 255, 255 but with an alpha value. Color really doesn’t matter this way since it’s not used, only the alpha value is. The result looked like this:


I know I should’ve done a nice radial gradient to make this clearer, but you can obviously see the top right dot only blends away a bit of darkness. :stuck_out_tongue:

If you have lights rendered black on white or vice versa (no alpha channel or alpha=1 everywhere), this should also be possible. I thought the following blendstate would work

// create the blend state
var blend = new BlendState
{
    AlphaSourceBlend = Blend.Zero,
    AlphaDestinationBlend = Blend.[Inverse]SourceColor,

    ColorSourceBlend = Blend.Zero,
    ColorDestinationBlend = Blend.[Inverse]SourceColor,
};

But it didn’t… Sooooo… I’ll have another look at this when I get the chance, this should really be possible.

3 Likes

This looks really promising! I will give it a go as soon as I gather enough power cells.

Will post results!

1 Like

Your code works, and is very easy to use/follow… Thanks for taking the time, I searched far and wide, even followed 2 dead-end tutorials… :slight_smile:

So I had to use a black to transparent gradient for the light mask,
but I just inverted what I had…

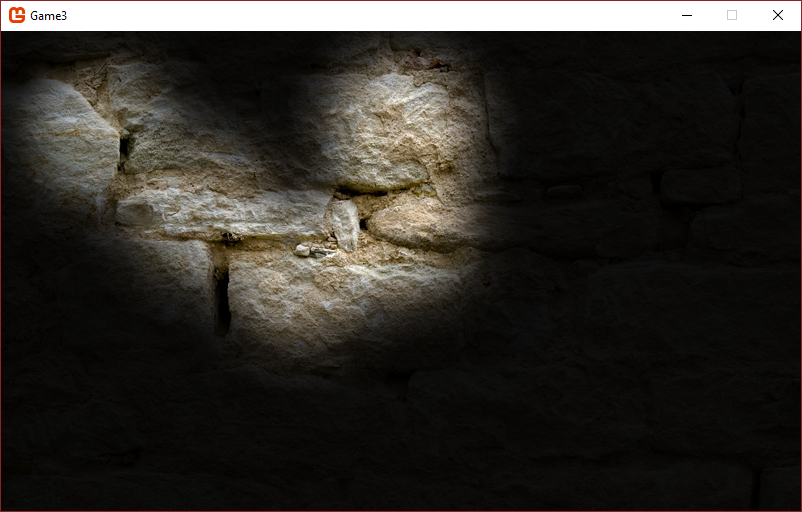
The code looked bad on top of a naked cornflower blue, but on a texture, its very nice.
Seems you can adjust intensity by tweaking the alpha value when drawing the lights, so that’s nice… Also radius is set by scale, and everything is like normal sprites.

It doesn’t do colored lights though, but my guess would be to draw another layer containing color information, and super-imposing that?

You might have to find a better gradient, mine is just a 5 second gimp mouse-fill…

But here are my results ():

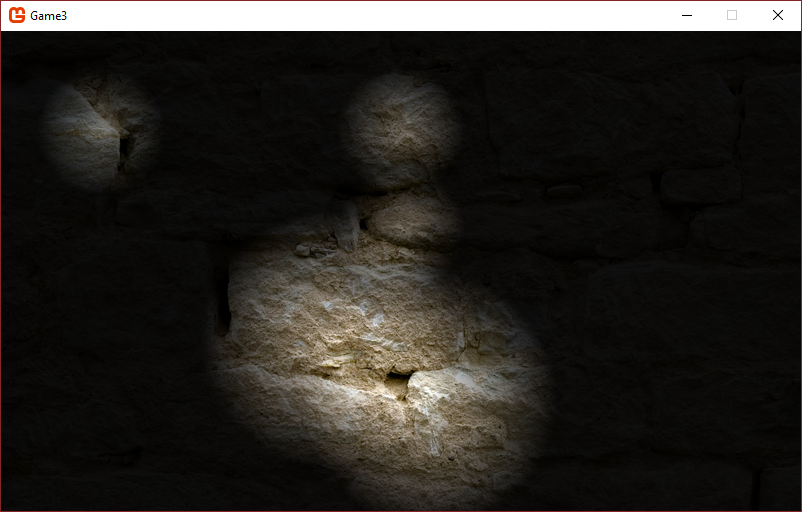
EDIT: Here I used 2 sprites for each light, one bigger and dimmer than the other.
I think it looks better… Demonstrating that its best to find a sprite different than a simple gradient fill… I think.

2 Likes

Jjagg, I followed through your example, tinkered around and got it working like I want! Of course It still needs work, but the darkness with light-around-lightsources is now in place :slightly_smiling:
At first it was confusing to use RenderTarget and drawing on it, but I think I got how it works.

Thanks!

1 Like

Check it out with colors added… When they move around, it looks like magic.

Still done just with blending, and no work on the actual textures

… This stuff is amazing.

All kinds of thoughts occur… 10 / 10 will use in future…

That’s amazing! Are you just doing the same dark effect, but before drawing the dark you draw transparent rectangle with wanted colors?

So this is just a test, you could do it more effectiently, I was very carefull to keep the code simple to read, and modular, rather than super effecient… You could cut some steps, or combine them for effeciency… But here is what is happening:

First I did the stuff we discussed above… Got me the darkness mask…

Then I wanted the highlights… so for that, I basically just super-imposed my darkness/lights mask onto another layer, another alpha-mask, scimilar to the first one, but with stone highlights rather than lights. (Think I used gimps color to transparency for this) This makes it so you cant see the highlights until light hits them…

        BlendState blend = new BlendState();
        blend.AlphaDestinationBlend = Blend.SourceAlpha;

        GraphicsDevice.SetRenderTarget(reflectiveness);  // new render target....
        GraphicsDevice.Clear(new Color(00, 00, 00, 0));
        spriteBatch.Begin(blendState: blend);
        spriteBatch.Draw(reflectiveMap, new Vector2(0, 0), Color.White * 1f);
        spriteBatch.Draw(darkness, Vector2.Zero, Color.White);
        spriteBatch.End();

Color stuff in the next post :slight_smile:

Then, for colors:

Here I actually do the same darkness mask trick, but while removing the alpha for the lights, I also go ahead and add color from the lights…

        GraphicsDevice.SetRenderTarget(colorness);
        GraphicsDevice.Clear(new Color(0, 0, 0, 255));

        var blend = new BlendState
        {
            AlphaBlendFunction = BlendFunction.ReverseSubtract,
            AlphaSourceBlend = Blend.One,
            AlphaDestinationBlend = Blend.One,

            ColorBlendFunction = BlendFunction.Add,
            ColorDestinationBlend = Blend.InverseSourceColor,
        };

        spriteBatch.Begin(blendState : blend);     

        for (int i = 0; i < StartingCount; i++)
        {
            spriteBatch.Draw(alphaMask, positions[i], null, colors[i] , 0, new Vector2(128, 128),   1.6f, SpriteEffects.None, 0);
        }
    
        spriteBatch.End();

And THEN, to top it off, and just because I found it looked better, I draw a layer on top containg some dark parts that are never lit up, like deep cracks, or holes that go far into the back ground…
Or simply a layer of dust or dirt that covers the reflective minerals…

I use varying alpha values on this layer too, so some parts are just dimmer and not completely dark.

I found this step important too…
But again, this is just a first attempt, right out of the bag, so you could tune it all better…

However, it really brings the wall to life… Looks creepy as hell, like a real dungeon :slight_smile:

So many settings looked good, some things I did made the wall look wet, some made it look like glass bricks glowing from the inside…
Some looked like ICE rather than rock…

Its insane :slight_smile:

Just want to add: I found all this hard to grasp, and harder to get results without black squares and other ‘artifacts’… I mean, who ever heard of “reverse subtracting one transparency from another”…
… But my level of understanding has been improving, like with anything else monogame…
I think this will become second nature, like using layers with different properties in Gimp…

You dont have an internal model for understanding this stuff, because it is like nothing else… it has to emerge over some hours…

…If this wall of text didnt help you, post back, and I’ll paste my entire code and all the assets, and you can at least run it and see whats up… Its like one or two scroll-downs of code…

Hi all!
I tried this section is really useful. It would be a question of how to solve simultaneously the empty hole and “Additive” lighting a piece of SpriteBatch? It can only succeed if its first SpriteBatch texture of the mask, the second black layer, and the third is the one that draws the mask texture additive, with custom colored. I think that this whole process can be solved by using two pieces of SpriteBatch well. I use a simple transparent texture with one white spot. My code is now:

    Texture2D light, stones;
    RenderTarget2D darkness;
    BlendState blend = new BlendState();

        darkness = new RenderTarget2D(GraphicsDevice, graphics.PreferredBackBufferWidth, graphics.PreferredBackBufferHeight);

        blend.AlphaSourceBlend = Blend.Zero;
        blend.AlphaDestinationBlend = Blend.InverseSourceColor;
        blend.ColorSourceBlend = Blend.Zero;
        blend.ColorDestinationBlend = Blend.InverseSourceColor;

        GraphicsDevice.SetRenderTarget(darkness);

        spriteBatch.Begin(blendState: blend);
        spriteBatch.Draw(light, new Vector2(0, 0), Color.White);
        spriteBatch.Draw(light, new Vector2(100, 0), Color.White);
        spriteBatch.Draw(light, new Vector2(50, 100), Color.White);
        spriteBatch.End();

        GraphicsDevice.SetRenderTarget(null);

        spriteBatch.Begin();
        spriteBatch.Draw(stones, Vector2.Zero, Color.White);
        spriteBatch.Draw(darkness, Vector2.Zero, Color.White);
        spriteBatch.End();

        spriteBatch.Begin(SpriteSortMode.Immediate, BlendState.Additive);
        spriteBatch.Draw(light, new Vector2(0, 0), Color.Red);
        spriteBatch.Draw(light, new Vector2(100, 0), Color.Green);
        spriteBatch.Draw(light, new Vector2(50, 100), Color.Blue);
        spriteBatch.End();

And the result:

How good is this solution be applied? Can i fix it? So I do not understand, how should I set the Blend properties for one SpriteBatch.

Hi Pixi91

Looking good :slight_smile: I found that tweaking various alpha values had a profound impact… There are just some settings that look more convincing than others, and I found it necessary to experiment, as it is hard to predict results precisely.

If I understand your question correctly, you are asking if this can be achieved in fewer steps, ie simultaneously with less draw-calls…?

I had that feeling… In the step where you remove alpha value, you can also add color…
Alpha-blending and color-blending are set independently of each other…

One of us will have to actually do it, and post back… I nominate you, because you are younger and stronger :slight_smile:

Hi Monopalle, I would love to see the entire code and assets, looks like some great work there, so far all I can do is draw a sprite to the screen, blending, rendertargets etc is quite new to me - though I understand what a rendertarget is to a degree.

Cheers

Ok, heres the code bit… Some parts of it are just for moving lights and loading textures, but I included it all so it will compile if you simply copy-paste the whole thing… The parts you are after, are commented, and mostly in the Draw() method, and a SEPERATE draw_colors method… Am posting used textures
in next post…

NOTE: while this code runs, its pretty jumbled from tons of editing and testing…
The way it looks now may not be my coolest results, but they demonstrate the colored lights, and some other fun and simple stuff…

using System;
using System.Collections.Generic;
using System.Linq;
using Microsoft.Xna.Framework;
using Microsoft.Xna.Framework.Audio;
using Microsoft.Xna.Framework.Content;
using Microsoft.Xna.Framework.Graphics;
using Microsoft.Xna.Framework.Input;
using Microsoft.Xna.Framework.Media;

namespace Game3
{

public class Game1 : Game
{
    GraphicsDeviceManager graphics;
    SpriteBatch spriteBatch;

    // These are just the lights... So I can move them around.
    static List<Vector2> positions = new List<Vector2>();
    static List<Vector2> directions = new List<Vector2>();
    static List<Color> colors = new List<Color>();

    static Texture2D light_gradient;
    static Texture2D stones;
    static Texture2D dust_layer;
    static Texture2D deep_shadows;

    RenderTarget2D darkness;
    RenderTarget2D reflectiveness;
    RenderTarget2D colorness;


    public Game1()
    {
        graphics = new GraphicsDeviceManager(this);
        Content.RootDirectory = "Content";

        graphics.PreferredBackBufferWidth = 900;
        graphics.PreferredBackBufferHeight = 600;

    }

    //Just for counting lights....
    static int itemCount = 0;
    static int StartingCount = 0;

    protected override void Initialize()
    {


        var pp = GraphicsDevice.PresentationParameters;
        darkness = new RenderTarget2D( GraphicsDevice, pp.BackBufferWidth, pp.BackBufferHeight);
        reflectiveness = new RenderTarget2D(GraphicsDevice, pp.BackBufferWidth, pp.BackBufferHeight);
        colorness = new RenderTarget2D(GraphicsDevice, pp.BackBufferWidth, pp.BackBufferHeight);

        positions.Add(new Vector2(100,200));
        directions.Add( new Vector2(-1.5f,-1.2f));
        colors.Add(new Color(0,0,255,255));

        positions.Add(new Vector2(400, 300));
        directions.Add(new Vector2(-1.2f, 1.6f));
        colors.Add(Color.Red);
        
        positions.Add(new Vector2(250, 400));
        directions.Add(new Vector2(-0.51f, 1.0f));
        colors.Add(Color.Green);
                

        foreach (Vector2 pos in positions)
        {
            StartingCount++;
        }

        itemCount = StartingCount;

        base.Initialize();
    }


    protected override void LoadContent()
    {

        spriteBatch = new SpriteBatch(GraphicsDevice);

        light_gradient = Content.Load<Texture2D>("light");
        stones = Content.Load<Texture2D>("stones");
        dust_layer = Content.Load<Texture2D>("stones_dust");
        deep_shadows = Content.Load<Texture2D>("cracks");

    }


    // All the update does, is run a counter that cycles through my lists of pos_vectors, and moves them by the
    //corresponding dir_vectors....    It bounces them around when they hit the edges...
    
    protected override void Update(GameTime gameTime)
    {

        itemCount = StartingCount;

        while (itemCount > 0)
        {
            itemCount--;
            positions[itemCount] += directions[itemCount];

            if (directions[itemCount].X > -(itemCount+1) && positions[itemCount].X > GraphicsDevice.PresentationParameters.BackBufferWidth-128)
                directions[itemCount] = new Vector2(directions[itemCount].X - 0.009f, directions[itemCount].Y);

            else if (directions[itemCount].X < itemCount+1 && positions[itemCount].X < 128)
                directions[itemCount] = new Vector2(directions[itemCount].X + 0.009f, directions[itemCount].Y);

            if (directions[itemCount].Y > -(itemCount+1) && positions[itemCount].Y > GraphicsDevice.PresentationParameters.BackBufferHeight-128)
                directions[itemCount] = new Vector2(directions[itemCount].X , directions[itemCount].Y - 0.009f);

            else if (directions[itemCount].Y < itemCount+1 && positions[itemCount].Y < 128)
                directions[itemCount] = new Vector2(directions[itemCount].X , directions[itemCount].Y + 0.009f);

        }

        base.Update(gameTime);
    }

    protected override void Draw(GameTime gameTime)
    {

        //------------- COLORED LIGHTS--------------------------------------
        // first, I draw my color layer to its own rendertarget, and save it for later...
        //You can comment this out for standard white lights....
        Draw_Color();


        //------------- THE DARKNESS--------------------------------------
        //then I draw the darknes to ITS own rendertarget, as in previous post....
        GraphicsDevice.SetRenderTarget(darkness);
        GraphicsDevice.Clear(new Color(0, 0, 0, 255));

        //-------------- LIGHTS IN THE DARKNESS----------------------------------------------------
        //now I blend the lights with the darkness, to give me the basic "black with holes" layer....
        //first set the blendstate,
        var blend = new BlendState
        {
            AlphaBlendFunction = BlendFunction.ReverseSubtract,
            AlphaSourceBlend = Blend.One,
            AlphaDestinationBlend = Blend.One,
        };

        // then draw the lights using the blendstate above...
        spriteBatch.Begin(blendState: blend);
        foreach (Vector2 pos in positions)
        {
            spriteBatch.Draw(light_gradient, pos, null, Color.Black * 0.6f, 0, new Vector2(128, 128), 1.5f, SpriteEffects.None, 0);
            spriteBatch.Draw(light_gradient, pos, null, Color.Black * 0.15f, 0, new Vector2(128, 128), 0.8f, SpriteEffects.None, 0);
            spriteBatch.Draw(light_gradient, pos, null, Color.Black * 0.05f, 0, new Vector2(128, 128), 0.6f, SpriteEffects.None, 0);
        }

        spriteBatch.End();


        // set the render target back to the backbuffer..... And draw all the render-targets and textures....
        GraphicsDevice.SetRenderTarget(null);
        GraphicsDevice.Clear(Color.Black);
        spriteBatch.Begin();

        //first the raw stone wall....
        spriteBatch.Draw(stones, new Vector2(0, 0), Color.White);
        
        //what to draw on top of the stones, and in what order, is all fun and tweaking games...

        spriteBatch.Draw(colorness, Vector2.Zero, Color.White);

        // the dust layer is drawn before the darkness (and thus the lights) but after the color...
        // in this way, the way the wall reflects color varies from place to place....
        spriteBatch.Draw(dust_layer, new Vector2(0, 0), Color.White);

       
        spriteBatch.Draw(darkness, Vector2.Zero, Color.White * 0.99f);
        //Deep shadows and cracks are drawn last, because nothing should be reflecting off them...
        spriteBatch.Draw(deep_shadows, new Vector2(0, 0), Color.Black * 1f);
        spriteBatch.End();

        base.Draw(gameTime);
    }


    private void Draw_Color()
    {
       
        GraphicsDevice.SetRenderTarget(colorness);
        GraphicsDevice.Clear(new Color(0, 0, 0, 255));

        var blend = new BlendState
        {
            AlphaBlendFunction = BlendFunction.ReverseSubtract,
            AlphaSourceBlend = Blend.One,
            AlphaDestinationBlend = Blend.One,

            ColorBlendFunction = BlendFunction.Add,
            ColorDestinationBlend = Blend.InverseSourceColor,
        };

        spriteBatch.Begin(blendState : blend);     

        for (int i = 0; i < StartingCount; i++)
        {
            spriteBatch.Draw(light_gradient, positions[i], null, colors[i] , 0, new Vector2(128, 128), 1.6f, SpriteEffects.None, 0);
        }
    
        spriteBatch.End();


    }
}

}

1 Like

Heres the 4 pics used… If something looks all white, its just the thumbnail. actual images hold data, but transparency and white-gradients are lost on the forum.

he, only the last picture looks normal here…

1 Like

This is great, thanks for posting this so quickly.
Edit - after playing around for a little while, this makes perfect sense to me on how your are doing it, love tweaking with the numbers to see what it actually does. e.g. In the Draw:

_spriteBatch.Draw(_lightGradient, pos, null, Color.Black * 0.2f, 0, new Vector2(128, 128), 0.90f, SpriteEffects.None, 0);
_spriteBatch.Draw(_lightGradient, pos, null, Color.Black * 0.3f, 0, new Vector2(128, 128), 0.60f, SpriteEffects.None, 0);
_spriteBatch.Draw(_lightGradient, pos, null, Color.Black * 1.0f, 0, new Vector2(128, 128), 0.25f, SpriteEffects.None, 0);

this gives it a bright middle bit and darker on the edges, more like a torch.

1 Like

my whole pc freezes when minizing the game window using this solution…

my driver is nvidia driver 390.141 64 bits linux mint 20.1 OS