Setting up Content Pipeline
Hey there, Valentine here.
So, a little ‘need to know’ here, I use OneDrive, and as such my Documents folder sits on OneDrive, this makes me a little fuzzy when it comes to installing MonoGame because… well, look here:
(Secret note here, this was a screen grab using the new annotations app in Windows 10 and as such it is called: ‘Annotation 2019-03-24 224959.jpg’ we will come back to this later)
See it?
Yep, I guess just because the directory exists in my user documents folder for Visual Studio (VS) 2015, it somehow recognises it being there during install (Even though physically it is not always actually there), I might be able to shed more light on this in future when I take a closer look at the install package, maybe a year later… but no, I do not have VS 2015 installed either.
Anyway…
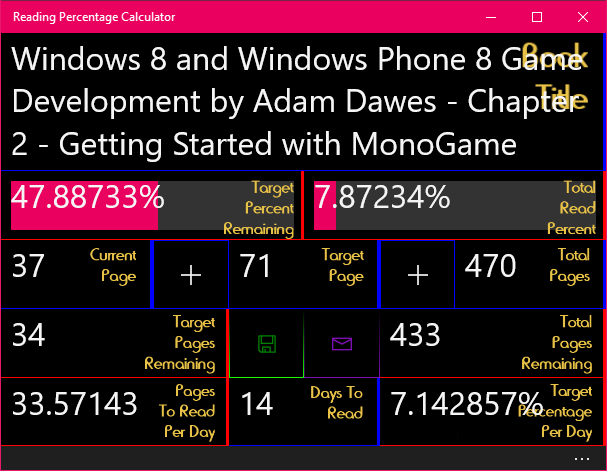
I made a choice change, I will start mentioning my current book which I am using to study MonoGame with… and the current one is:
Shameless plug but that’s an app I created and is free on the store if anyone wants to use it, I wanted to point out, that the share button in the middle caused the app to fail XBOX submission… otherwise it would be on it too.
About the book, it was the only book I could find tackling the now named, UWP platform (Well I lost track honestly).
Moving along, I am following along the book mentioned in the image above, and Chapter 2 introduces adding assets to MonoGame using the XNB file formats, the history of this is in the book so if you wish to learn more about it, it’s in there. What I will add here is the process in the book is more or less, obsolete almost… and the new Pipeline tool pretty much replaces the method mentioned in the book thus far, it even says as much that it would be replaced in future (That is, post 2013).
Onto my setup, I learned of many mishaps regarding the pipeline tool… oops…
What is the pipeline tool you ask? Well as mentioned already it is what you will use to prepare your assets, whether it be audio, video, images or mesh models, you will need to prepare it or ‘convert’ it to a format MonoGame works best with.
As I was saying and before I forget, here is another thing, it is possible to convert your assets within a VS project, but as there are multiple methods to this, I am suggesting one which works with most project workflows.
OK, my suggested setup, may not be ideal for you, but I am sure someone may point out a better method for your liking and workflow, but for me, this works, so, not long ago the process of XNB conversion was simplified by way of a standalone tool in the form of an executable (.exe) application, let’s move along now.
There’s only one issue with this, you need to use it like a project, and if you are not careful as mentioned earlier, errors were made by some users and it had the unsettling effect of wiping out entire projects… apparently, permanently! (unless you are like me and you archive everything as you progress). From this I worked out that users were placing these Pipeline projects inside their VS projects or setting the export directories to them, which is a terrible idea from my point of view, Why? Well, there is an option to clean – just like in VS – a build, which deletes everything in the export folder and then recreates things, but as I have not dug into this source code for the Pipeline, I will settle for the safest method, putting it on a standalone secondary computer and setting it up in a slightly safer folder structure per project.
OK, so perhaps you do not have an old computer lying around that you can use, but the precautions I underline here on out should still almost save you from complete anarchy and a long lengthy bathroom run… get those brown pants on, prompt!
Heh, joking aside, let’s get down to the nitty gritty…
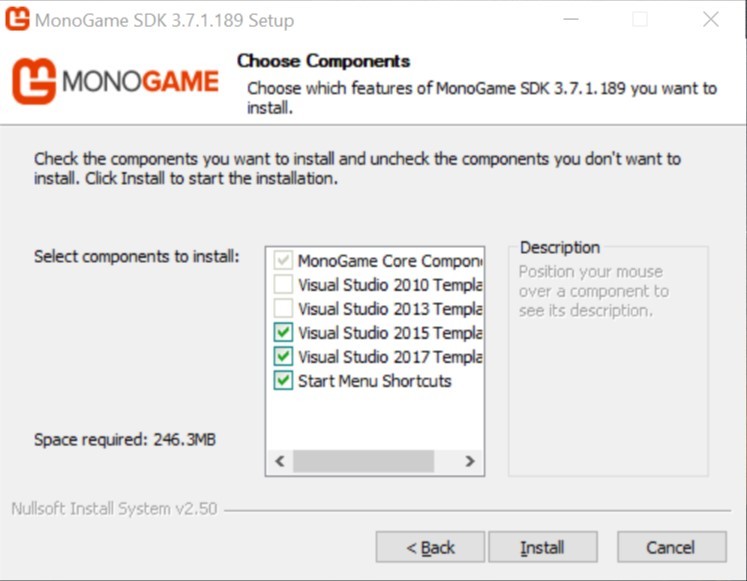
I suggest you put a computer on the side and install the latest release of Visual Studio (currently the Ace Team of MonoGame is currently preparing MonoGame to support the soon to be released 2019 VS edition, but at the time of writing this, it was 2017 as the most recent supported edition so, just presume you can install 2019 already or install 2017 if the MonoGame installer doesn’t work for you – side note, let me know if you need help installing Visual Studio, and I will…………. Consider putting a guide together to get MonoGame up and running) and then download and run the latest MonoGame installer for VS on Windows and ensure you can install the templates as in the above image (you won’t need 2015). You can find the link for the latest installer for MonoGame here: http://www.monogame.net/downloads/ - where the latest link (at the time of this writing) is 3.7.1, which will take you to a forum post where you should click ‘MonoGame 3.7.1 for VisualStudio’ which will download the setup executable. At the time of writing, this was the link to download Visual Studio Community 2017 which is a free edition of Visual Studio, no costs involved whatsoever, this can be downloaded here (for now): https://visualstudio.microsoft.com/vs/community/ - by the time some of you read this, it may have been updated to the 2019 release, I suggest a web search after April 2019.
I apologise for the depth of that paragraph…
So, that list of directions works for both your development computer as well as your asset building system (So whether you have a spare computer or not, keep reading), hold up for a second, just want to clarify a nifty feature that will make working between these distant systems, easier.
You could go old school and isolate these systems and use a USB drive between them (you old school cool person, you! {Shakes fist}), or be more modern and utilise OneDrive to transfer files between them, this has the added benefit of being a live backup system and actually for some files… version history and recovery options too.
Anyway, from this point forward, you can assume I mention transferring files via a folder between your two computers when I say: ‘Now import this to your VS project’ or something to that effect.
So, ignoring my setup there and assuming you are going forward with or without the added safety (secondary computer) as mentioned already, let’s get this Pipeline out of the way (for now).
Once you successfully install VS and MonoGame, you should find a shortcut in your start menu under ‘MonoGame’ called ‘MonoGame Pipeline’ or if you prefer, look for and run “C:\Program Files (x86)\MSBuild\MonoGame\v3.0\Tools\Pipeline.exe”, you could also try copy pasting that to your Run command without the quote marks I guess. I also suggest you Pin the Pipeline tool to your taskbar once you have it running, you can do this by either dragging the start menu shortcut to your taskbar or once you have it running right clicking it in your taskbar and clicking ‘Pin to taskbar’, that way you can just click it there to run it in future.
Once you have the Pipeline tool running, you should see a window like this:

Oh, you see that file name mentioned earlier, more on that shortly…
Note that the list box in the top left would also be blank… first things first, we need to get our directories in order…
Click ‘File’ and then ‘New…’ (by the way, this … is called Ellipsis, I use it a lot!)
Now you should see a file extension here called ‘.mgcontent’ which as you should see is a ‘MonoGame Content Build Project’ file extension. Don’t change the extension type here.
What we will do however at this point is go over into C:, click ‘This PC’ on the left or along the top of the frame and then click into C:, here you can right click (Ok, some people may disagree with this, so an alternative folder would be either your My ‘Documents’ (It’s just Documents but I miss the older Windows folder naming’s) folder or a folder in another disk drive such as D:\ or an external USB drive works just as well) or simply click ‘New Folder’ at the top of the window.
Name the folder like so: ‘MonoGame Pipeline Exports’ or whatever you wish to name it, but I will use this from here on out.
You should have this folder in your C:\ drive now (or wherever you put it or whatever you named it) ‘C:\MonoGame Pipeline Exports\’
Now click into this folder if not already in it and create another new folder called: ‘Test Exporting’ or again, whatever you wish to name it, I figured I could just use this one folder while following the book, but when I start working on projects, they will have their own respected folders, but for now, let’s move ahead.
Now, in the ‘File name:’ field, put: ‘TestExporting’ (no spaces, just for the purpose of this tutorial) which should give you a project name of ‘TestExporting.mgcb’ inside the folder ‘C:\MonoGame Pipeline Exports\Test Exporting’.
So, to clarify, you have some protection from accidently deleting your entire C:\ drive, thanks to the first folder ‘MonoGame Pipeline Exports’ this folder also acts as a Hold-All folder. Second you have the secondary folder which allows you to isolate per project assets. Now you might be saying, I am only working on a single project right now, and why would I need multiple project asset folders? Well, what if you want to make a level editor? You still need to convert assets to use with that editor (I should point out here, you could also embed the Content Pipeline into your projects to create ‘on-the-fly’ asset imports but this is not an out of the box solution, yet).
Oh, ok before I talk about further protection levels, I should get to what, why and how you are safeguarding from said issues.
Let’s go back to that Pipeline tool, before you proceed, I suggest doing something first, find an image you wish to use for this experiment, heck, go download the official MonoGame Logo’s here: https://github.com/MonoGame/MonoGame.Logo and you can use one of them for the purposes of this tutorial. Ok, so you have an image, yes? Mine will be the one we looked at, at the very beginning of this tutorial… ‘Annotation 2019-03-24 224959.jpg’ it’s not important what your image is called but I can suggest keeping files short, descriptive and without spaces, makes future development and coding easier. Anyhow, this was just the name the new annotations (Snip & Sketch) app came up with.
Although in future I will probably suggest making a sub folder here, say, ‘Original Images’ and ‘Original Audio’ with respective sub folders going further such as a more understandable and organisable hierarchy such as ‘Original Images/Characters/Player Model Textures’ or ‘Original Audio/SFX/Game Menus’. For now, just place it inside: ‘C:\MonoGame Pipeline Exports\Test Exporting’.
Now, before continuing, in the Pipeline tool, click ‘File>Save’ or the Diskette icon.
At this point you should have:
C:\MonoGame Pipeline Exports\Test Exporting
- Annotation 2019-03-24 224959.jpg
- TestExporting.mgcb
So far so good? Let’s continue.
Now you need to click the icon (alternatively, click ‘Edit>Add>Existing Item…’) that shows ‘Add Existing Item’ when you hover over it. Ensure you choose the image we added to the folder earlier, click ‘Open’ in this dialogue box to close it and it should present the following:

Yep, the same image from earlier…
Let’s dig a little deeper at this point.
Click on your image in the upper left window frame and see what happens as below:
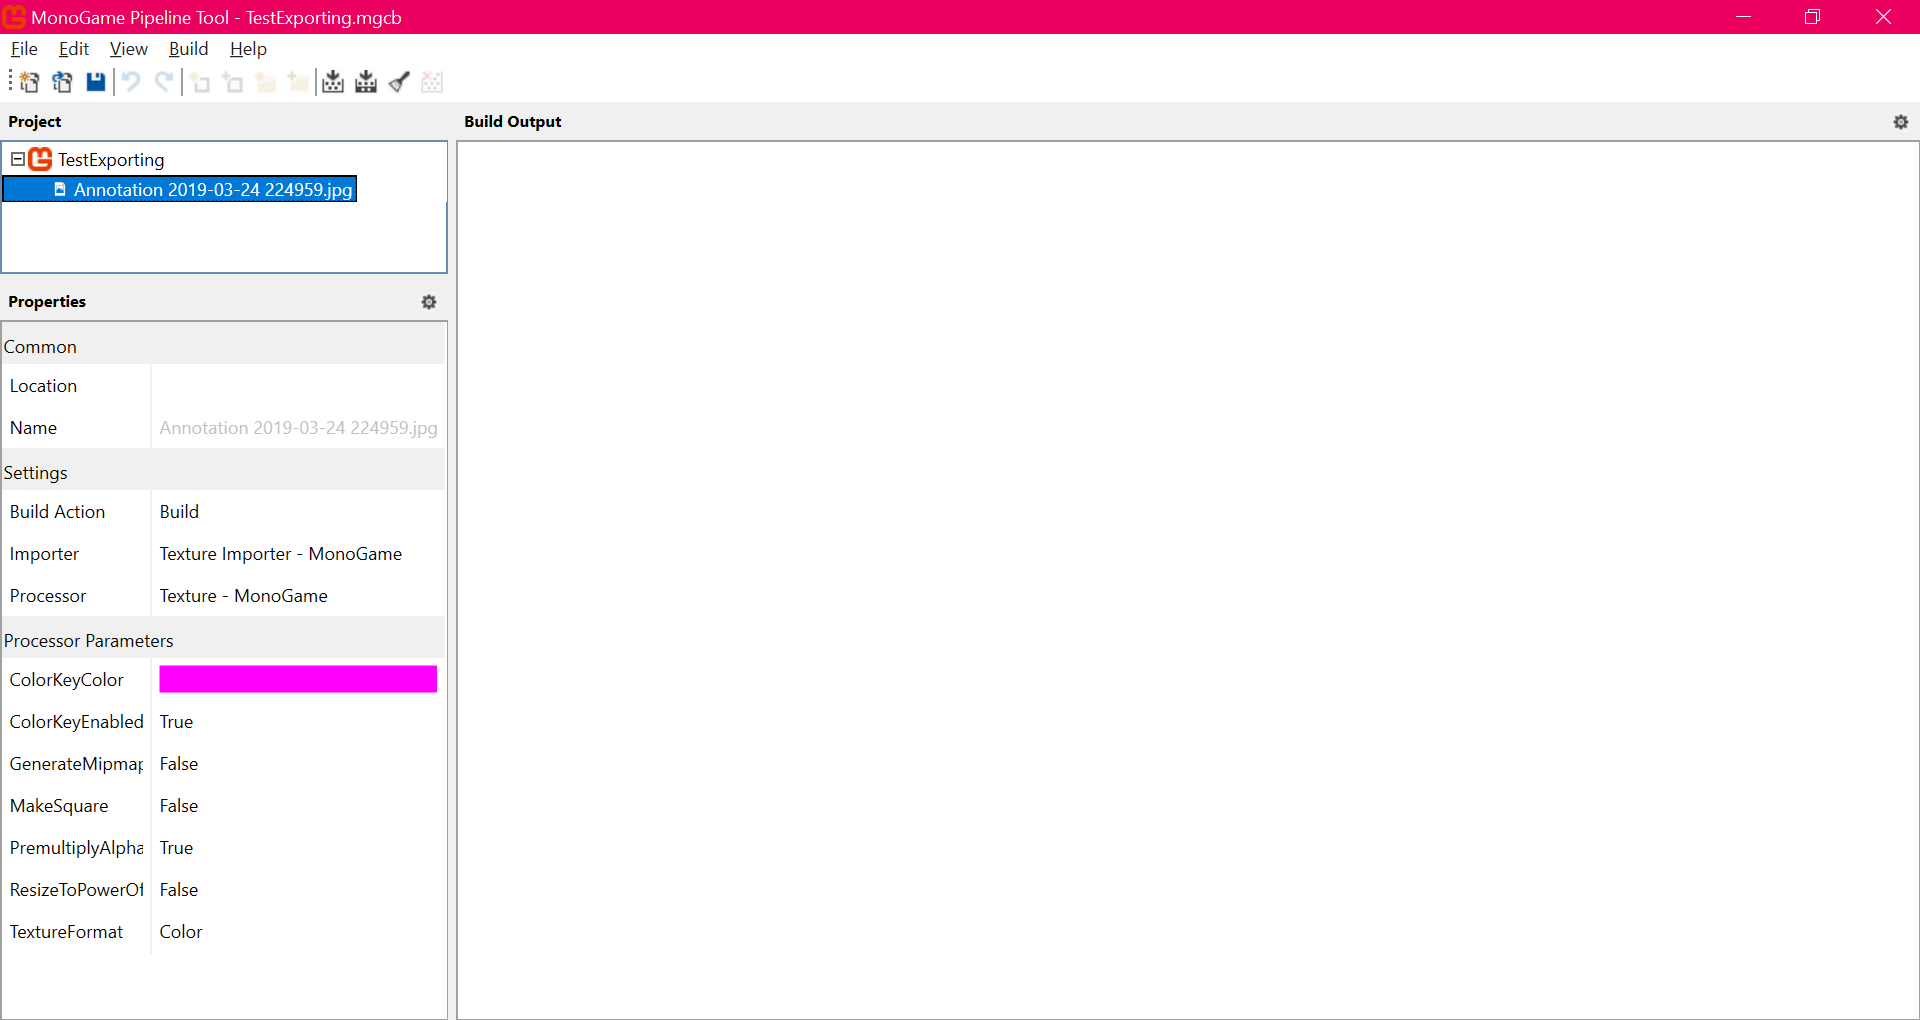
Oooh, Options! Yep, this is a very important aspect for you to get familiar with, but for the purpose of this tutorial, we won’t be discussing it much at present, I just wanted you to be aware of these options for now, they will come in much use for you in future. (if you are wondering why I am not simply saying Project, Properties or Build Output windows, probably because I have no idea what these say on non-English systems).
Next, we will build this project, I suggest clicking ‘Save’ at this point.
There are several other options in the top menu list, but let’s stick to essential commands right now.
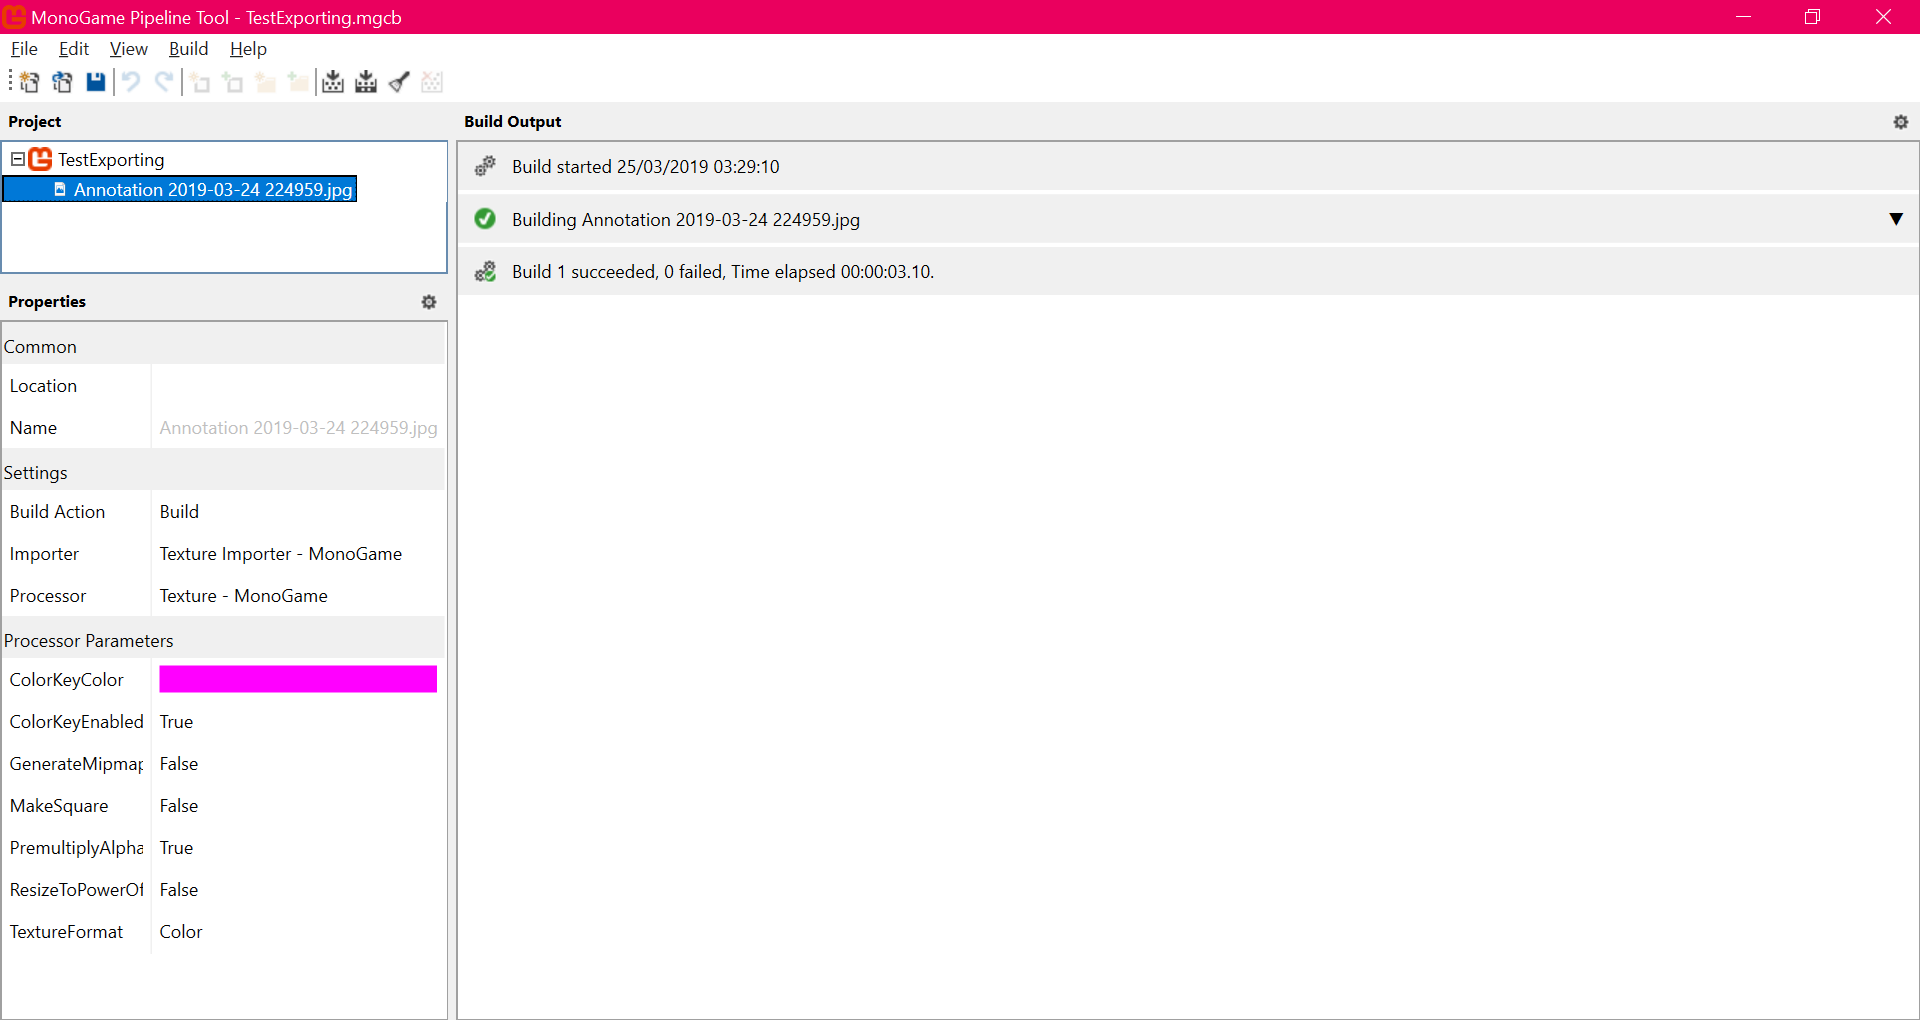
At the top, there are some icons, but there is also a menu item called ‘Build’ find the icon for this to speed up this step for yourself or hit F6 to build your asset(s).
At this point, with a little luck, you should see the following:
(I just realised this gave away the time I was working on this, I am finishing up this tutorial around 6am)
And you should find the following folder structure:
C:\MonoGame Pipeline Exports\Test Exporting
- \bin
- \obj
- Annotation 2019-03-24 224959.jpg
- TestExporting.mgcb
Let’s take a closer look at the two new folders, beginning with ‘obj’, as we won’t have too much use for this at this point:
C:\MonoGame Pipeline Exports\Test Exporting\obj
- .mgcontent
- .mgstats
- Annotation 2019-03-24 224959.mgcontent
I don’t really know what the first two files do really at this point but the last one I think can be added to your VS project somehow, I hope someone can shed some light on this at some point.
And now for the main event:
C:\MonoGame Pipeline Exports\Test Exporting\bin
- Annotation 2019-03-24 224959.xnb
As you can see, your image now has the extension in this folder of ‘.xnb’, it is now ready to use in the MonoGame engine, that is, once you get a project up and running, I should have that ready within 24 hours of this post. Note that you cannot usually see the content of this file at this point within Windows Explorer.
To conclude this tutorial, we will pick up where this left off in the next tutorial, getting your first project up and running and displaying that image!
Something I wanted to add here, you may be thinking, this was a ‘road to’, but in fact, the road has yet to begin, it ends when I publish my first game! and then it continues!
Valentine out.
EDIT
Used wrong \ in that last folder structure.