Writing your own 2D Pixel Shader in Monogame for Absolute Beginners

Original post that was rewritten for current MonoGame framework - https://gmjosack.github.io/posts/my-first-2d-pixel-shaders-part-1/

It has been about 7-8 years after the original post I linked above
and its pretty outdated, So I thought I might make a fresh one that works (What worked for me after I tried many things) so lets get into it.

SETTING UP:

Sprite used:

The first thing we’ll want to do add our texture to our project. Go ahead and add the texture you chose to the Content Pipeline (Double click on the Content.mgcb)

Texture2D texture;

Then in yout LoadContent method add the following line at the end substituting your assets name:

texture = Content.Load<Texture2D>("surge") // or whatever sprite you're using

Now lets go ahead and Draw it just to make sure everything is working as expected. Add the following to
your Draw method right above base.Draw();

spriteBatch.Begin();
spriteBatch.Draw(texture, new Vector2(0, 0), Color.White);
spriteBatch.End();

Now hit F5 and make sure everything compiles and looks okay. If you’re following along it should look something like this:

SETTING UP THE SHADER:

Open your Content Pipeline (like we previously did to add our sprite)
Follow the screenshot and create a “New Item…”

choose whatever name you’d like and be sure you’re selecting the Sprite Effect (.fx) option and then click OK.

Now lets go back to our Game1.cs (or whatever name you gave to your project/game)

Add a member variable of:

Effect effect;

And in your LoadContent method add the following line:

effect = Content.Load<Effect>("Effect1");

The rest of our changes will be in the Draw method. First we’re going to have to update our spriteBatch.Begin() call to use a new sort mode.

spriteBatch.Begin(SpriteSortMode.Immediate, BlendState.AlphaBlend);

You can look up the details of these options in the MSDN Reference. SpriteSortMode.Immediate is required to apply the effect.
BlendState.AlphaBlend is the default. After your Begin call we’re going to add the following line which will Apply the pixel shader to the sprite.

effect.CurrentTechnique.Passes[0].Apply();

Now open up your freshly created shader and you’ll see somthing like this:

#if OPENGL
	#define SV_POSITION POSITION
	#define VS_SHADERMODEL vs_3_0
	#define PS_SHADERMODEL ps_3_0
#else
	#define VS_SHADERMODEL vs_4_0_level_9_1
	#define PS_SHADERMODEL ps_4_0_level_9_1
#endif

Texture2D SpriteTexture;

sampler2D SpriteTextureSampler = sampler_state
{
	Texture = <SpriteTexture>;
};

struct VertexShaderOutput
{
	float4 Position : SV_POSITION;
	float4 Color : COLOR0;
	float2 TextureCoordinates : TEXCOORD0;
};

float4 MainPS(VertexShaderOutput input) : COLOR
{
	return tex2D(SpriteTextureSampler,input.TextureCoordinates) * input.Color;
}

technique SpriteDrawing
{
	pass P0
	{
		PixelShader = compile PS_SHADERMODEL MainPS();
	}
};

on the original tutorial it says to tear everything apart well DON’T DO IT EVER because you’ll
have lots and lots of errors and believe me you dont want them.

Our main function the we’re going to work with rightnow is:

float4 MainPS(VertexShaderOutput input) : COLOR
{
	return tex2D(SpriteTextureSampler,input.TextureCoordinates) * input.Color;
}

It takes in as a parameter a struct VertexShaderOutput where we have our variables

struct VertexShaderOutput
{
	float4 Position : SV_POSITION;
	float4 Color : COLOR0;
	float2 TextureCoordinates : TEXCOORD0;
};

Lets add a sampler2d you’ll be using these pretty often

right after your

Texture2D SpriteTexture;

add

sampler s0;

now lets change our float4 MainPS function to our needs
your new function should look as follows:

float4 MainPS(VertexShaderOutput input) : COLOR
{
	float4 color = tex2D(s0, input.TextureCoordinates);
	return color;
}

if you’ll compile it right now you’ll see no changes but lets add another line above the return color;

color.gb = color.r;

So your function in the end will look like:

float4 PixelShaderFunction(VertexShaderOutput input) : COLOR0
{
	float4 color = tex2D(s0, input.TextureCoordinates);
	color.gb = color.r;
    return color;
}

Hit F5 and see it in action

Hope I helped you starting with your first shader because I had hard time trying to setup something to work.

//If you saw some mistakes I made, please do let me now so I can fix it and make this tutorial as helpful as I can.

16 Likes

Nice one this is brill

1 Like

Great beginner tutorial, helpful for me.

2 Likes

Really helpful for me. Thank you.

SpriteTextureSampler vs s0

You know i think he should be using the sampler he defined using s0 makes things a bit unclear.
The s0 here is independent now from the texture so if two textures were used later that s0 will confuse a new person.

These lines go together because SpriteTextureSampler is a texture sampler that is linked to SpriteTexture.

Texture2D SpriteTexture;

sampler2D SpriteTextureSampler = sampler_state{ Texture = <SpriteTexture>; };


then later in the pixelshader

return tex2D( SpriteTextureSampler, input.TextureCoordinates) * input.Color;

so since people keep reading this i just wanted to point out when he says…

Lets add a sampler2d you’ll be using these pretty often

SpriteTextureSampler is a sampler that in this case is using s0 but doesn’t have to.
This can be confusing for shaders later on that may use more then one texture.
Since s0 isn’t linked to any texture in his definitions SpriteTextureSampler is.

4 Likes

Here is a full example with notes on how the shader and game1 relate to each other.

Instructions.

Make a dx project name it GreyScale
Copy save his rabbit image to your projects content folder name it rabbit.
Open the pipeline tool and add his rabbit image to the pipline.
Make a new effect called GreyScale.
Right click and open it so you see it in visual studio.
Copy this shader into it.
Copy the below Game1 code over the existing projects Game1 code.
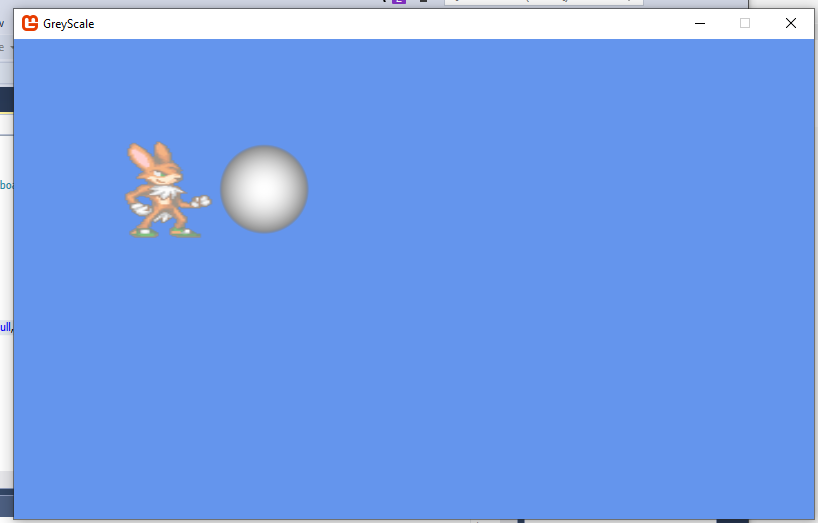
Save Build and Run.

sorry im super lazy this isnt grey scale its more like averaged towards grey.

#if OPENGL
#define SV_POSITION POSITION
#define VS_SHADERMODEL vs_3_0
#define PS_SHADERMODEL ps_3_0
#else
#define VS_SHADERMODEL vs_4_0_level_9_1
#define PS_SHADERMODEL ps_4_0_level_9_1
#endif

Texture2D SpriteTexture;

sampler2D SpriteTextureSampler = sampler_state
{
    Texture = <SpriteTexture>;
};

struct VertexShaderOutput
{
    float4 Position : SV_POSITION;
    float4 Color : COLOR0;
    float2 TextureCoordinates : TEXCOORD0;
};

// Ps stands for pixel shader this is were we can effect the change of colors to our images.
// When we passed our effect to spritebatch.Begin( .., ...,, effect,..) this is what effects all the Draw calls we now make.
float4 MainPS(VertexShaderOutput input) : COLOR
{
    float4 texelColorFromLoadedImage = tex2D(SpriteTextureSampler, input.TextureCoordinates);
     // we can clip low alpha pixels on the shader if we like directly .. we wont however here.
    // clip(texelColorFromLoadedImage.a - 0.01f);
    float4 theColorWeGaveToSpriteBatchDrawAsaParameter = input.Color;
    float4 blendedColor = texelColorFromLoadedImage * theColorWeGaveToSpriteBatchDrawAsaParameter;
    // Until now blendColor is just like a regular spritebatch draw you are used to.
    // So now we will weight the rgb color elements towards grey,
    // However in this case were not actually doing a greyscale but this is also kinda neat.
    blendedColor.rgb = blendedColor.rgb * 0.5f + 0.5f; 
    return blendedColor;
}

technique SpriteDrawing
{
    pass P0
    {
        PixelShader = compile PS_SHADERMODEL
        MainPS();
    }
};

Copy this to your game1.

Deffered works with it.

using Microsoft.Xna.Framework;
using Microsoft.Xna.Framework.Graphics;
using Microsoft.Xna.Framework.Input;

namespace GreyScale
{
    public class Game1 : Game
    {
        GraphicsDeviceManager graphics;
        SpriteBatch spriteBatch;
        Texture2D texture;
        Effect effect;

        public Game1()
        {
            graphics = new GraphicsDeviceManager(this);
            Content.RootDirectory = "Content";
        }

        protected override void Initialize()      { base.Initialize();}

        protected override void LoadContent()
        {
            spriteBatch = new SpriteBatch(GraphicsDevice);
            texture = Content.Load<Texture2D>("rabbit");
            effect = Content.Load<Effect>("GreyScale");
        }

        protected override void UnloadContent()  {}

        protected override void Update(GameTime gameTime)
        {
            if (GamePad.GetState(PlayerIndex.One).Buttons.Back == ButtonState.Pressed || Keyboard.GetState().IsKeyDown(Keys.Escape))
                Exit();

            base.Update(gameTime);
        }

        protected override void Draw(GameTime gameTime)
        {
            GraphicsDevice.Clear(Color.CornflowerBlue);

            // I used non premultiplied images so the this is set in begin and the alpha value is now relevant in the shader.
            // The alpha of a pixel in this context is the amount of transparency for the pixel in your image.
            // So if you edit a image in say paint.net to have a alpha value of zero it will be transparent under this pixel shader.
            spriteBatch.Begin(SpriteSortMode.Deferred, BlendState.NonPremultiplied, null, null, null, effect, null);
            spriteBatch.Draw(texture, new Rectangle(100, 100, 200, 200), Color.White);
            spriteBatch.End();

            base.Draw(gameTime);
        }
    }
}

two textures work as well side by side one after the other in draw.


// the effect of alpha blend instead on non premultiplied textures with this shader when clip is not used.

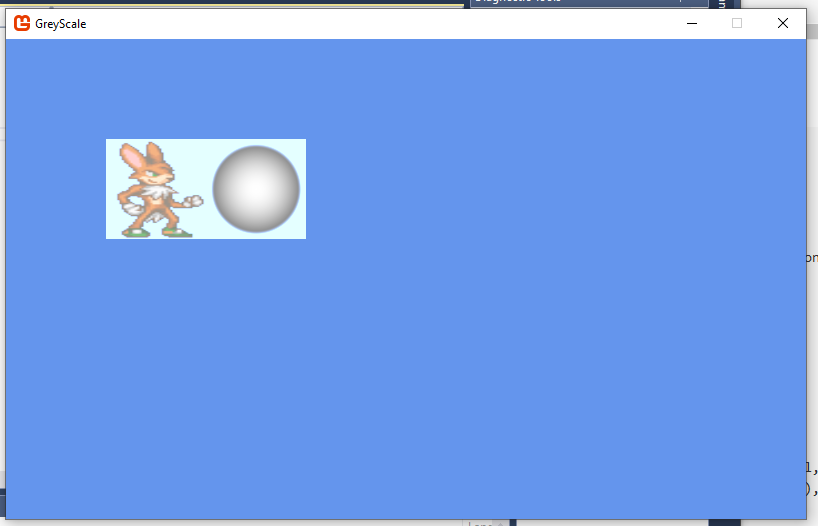
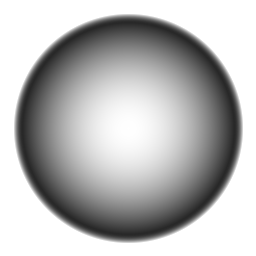
You can use this texture which i generated programatically based on distance with set data.
Just right click on it and save as image to your drive.
generated_image

    spriteBatch.Begin(SpriteSortMode.Deferred, null, null, null, null, effect, null);
    spriteBatch.Draw(texture, new Rectangle(100, 100, 100, 100), Color.White);
    spriteBatch.Draw(texture2, new Rectangle(200, 100, 100, 100), Color.White);
    spriteBatch.End();

Once you run it and look it over try making a little change like below or.
Use the grey scale formula or make something up yourself.

//blendedColor.rgb = blendedColor.rgb * 0.5f + 0.5f; 
blendedColor.r = 1.0f; 

Test run on DX.

1 Like

I wrote this one up long ago which shows how you can pass in a value to a shader to adjust the greyscale by pressing a key.

If you want to get a better idea of what is going on under the hood you may want to see how to do the same thing without spritebatch using quads directly which while is still 2d is a breath away from 3d.

I apologize if necromancing this conversation from 3 years ago is taboo. I’m extremely new to shaders and am having a very hard time finding learning resources. I’m making a 3D game using Monogame, and currently I can take .fbx files that export from art assets that I create in Blender, and I can load these .fbx files into my game. I also figured out how to save the vertex-buffers and index-buffers directly to a .cs file so that I can even draw models directly from their raw data without loading up the actual, fbx, which I think is really cool. So anyway, I understand that every conceivable type of VertexDeclaration always starts with a Vector3 for the X, Y, and Z axis of each vertex. This makes plenty of sense. For example, VertexPositionNormalTexture types start with a Vector3 for VertexPosition, which just makes a lot of sense. So the thing that’s confusing me is why all of the shaders I look at online have “float 4 Position” written in them. Shouldn’t it be “float 3”? In the shader above for example, we have “struct VertexShaderOutput { float4 Position : SV_POSITION; … … … }” I understand that Color is a float4 because of R, G, B and A channels; that makes sense. TextureCoordinates makes sense as a float2, although I don’t know if it’s referring to UVs of the model or if it’s referring to the position on the screen where it’s going to draw the pixel. Can anyone please help explain this better, or at least show a link to a current resource that explains these better? I really want to understand the link between the index-buffers&vertex-buffers and the shaders. It seems like there’s this wide gap of info that I’m missing. Thank you for all the posts so far, it’s much appreciated.

The 4th component of the position vector is for matrix math.
A float3 can only be multiplied with a 3x3 or 3x2 matrix. That’s enough for a scale or rotation matrix, but it’s not enough for a translation or projection matrix. Those need to be 4x3 or 4x4.

When you multiply a vector with a 4x4 matrix, the w-component of the vector is set to 1. The w-component of the resulting vector will be 1 for regular translation/rotation/scale matrices, so it could be ignored. For perspective projection matrices, however, the w-component of the resulting vector is important, that’s why the SV_POSITION is float4.

1 Like

Maybe this can help a bit. I ported a very nice pixel art planet generator made by DeepFold in Monogame’s HLSL language ages ago.
It’s rather outdated now, didn’t mirror his latest changes (yet) but it still has a lot of good stuff.

You can find the source code here: MonoGame Pixel Planet Generator by Enthusiast Guy

2 Likes