Carry more information per SpriteBatch.Draw

Happy New Year everyone! I’ve been bashing my head against my wall for the past few days trying to optimize my 2D top-down game.


The game is quite complex and has 12 different effects/shaders, like reflection, wave, masking, etc.

I know I should not optimize unless I have to, but the game’s performance has been quite bad for a little while now (when there’s more stuff on screen, it’s at ~20-30 fps). So I did some research and learned about reducing batches.

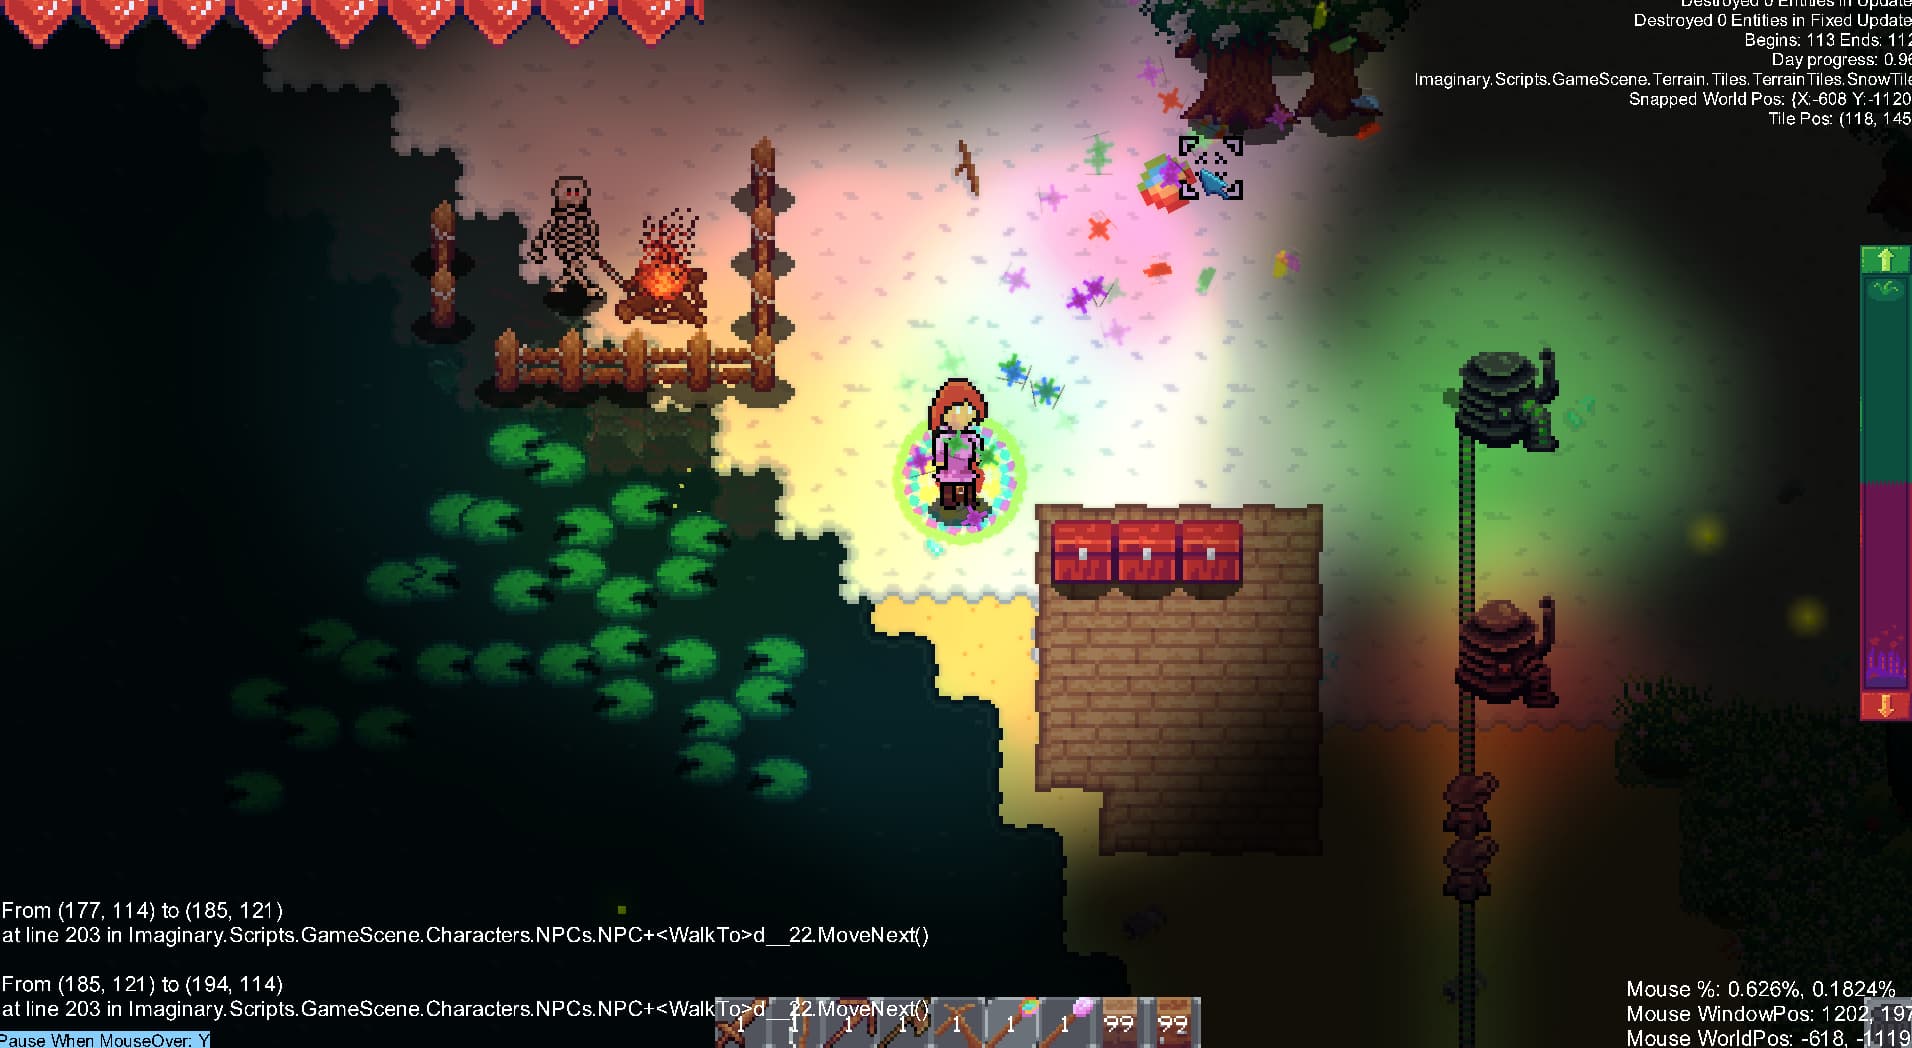
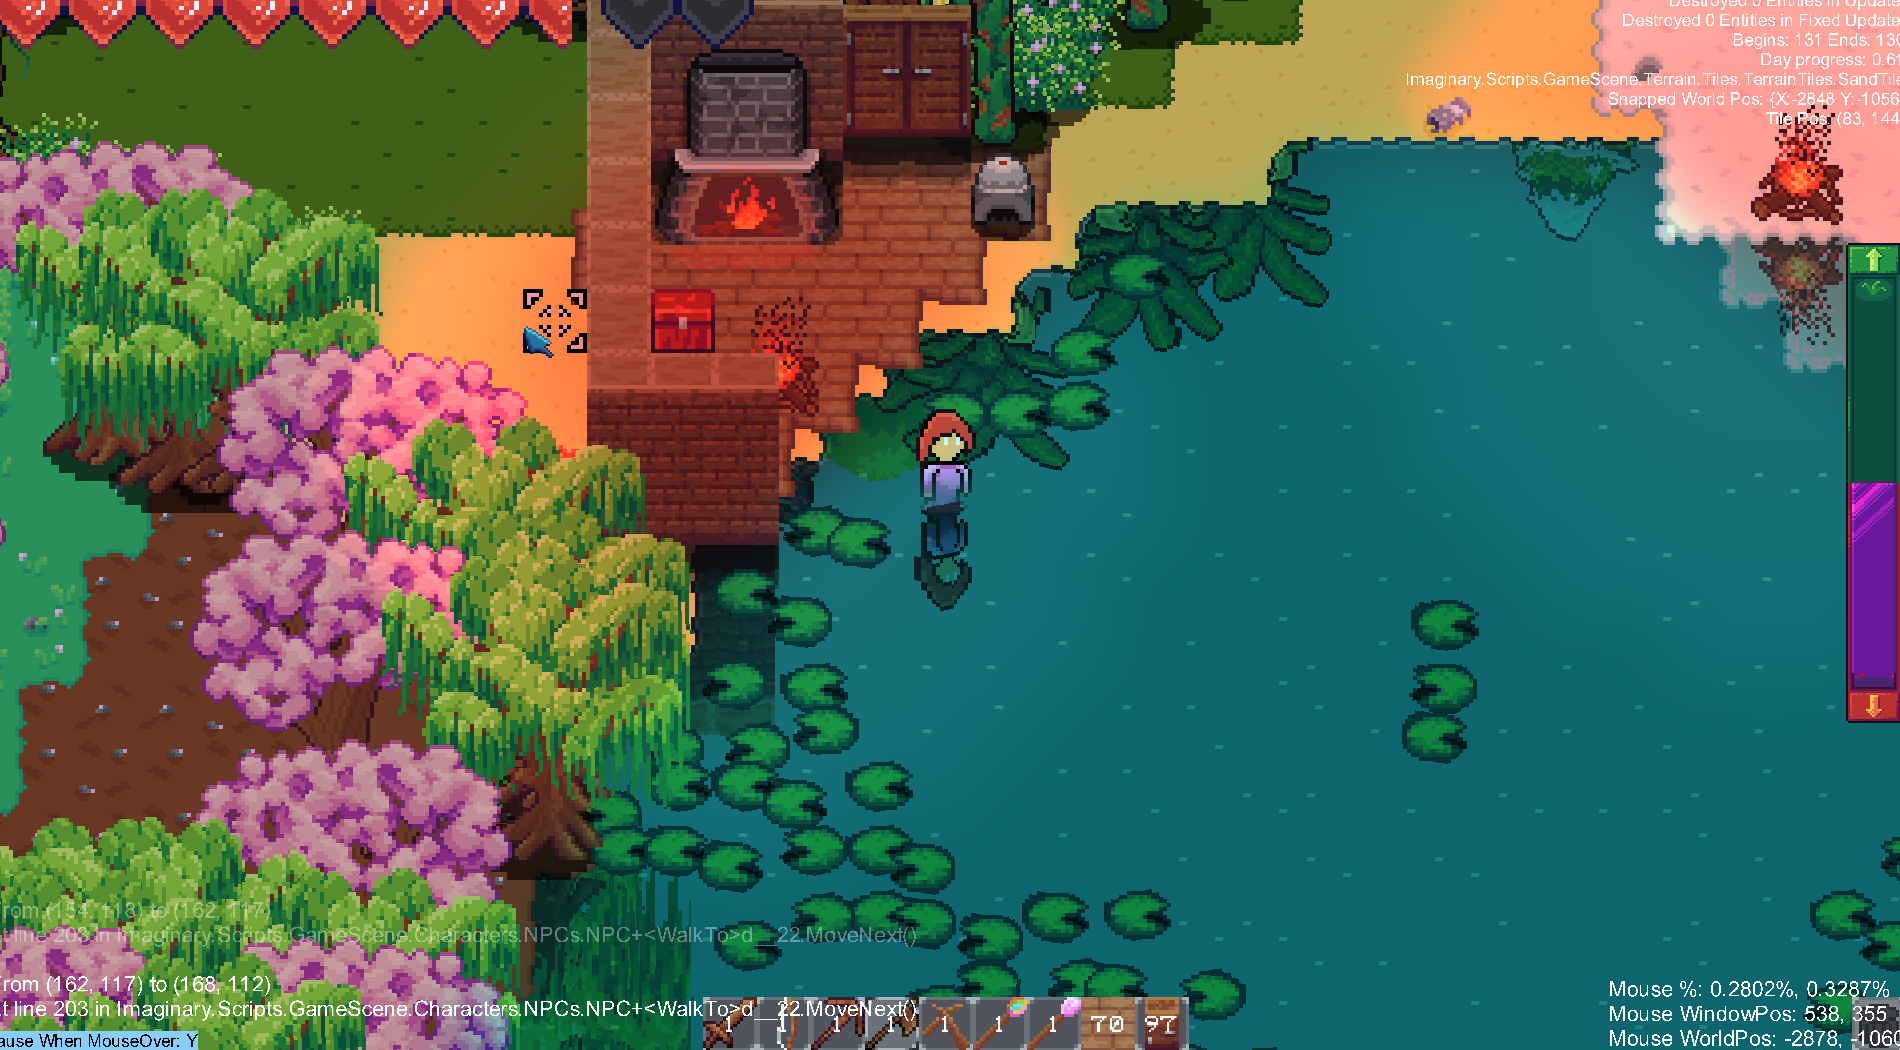
I already took some time to change my framework/engine a few days ago. Particularly, I created an automatic Texture Atlas packer that packs all my sprites when the game initializes, and I so far have not encountered any problems with that. But as you may be able to see from the top-right-corner debug thingy, I call SpriteBatch.Begin() 130 times per frame when next to lots of water because I need to maintain the draw order of tiles and for water tiles, render reflection and waves. 130+ batches per frame is obviously VERY VERY bad, even when they are mostly all deferred.

So I did more digging. Currently, I am in the process of creating a ‘master’ effect. It will contain all 12 effects (including the default no effect shader), and have a float parameter that determines which specific effect (reflection, wave, masking etc) to use.

That is very easy to do, but I realized for it to work, I must call SpriteBatch.Begin() with Immediate sort mode instead of the much faster Deferred, which means more batches than even the 130 right now. i.e., even though I will have only 1 effect at all times, each time I call Draw() I would need to apply different parameters, and I think Deferred mode will only ‘store’ the last parameters I applied when I call SpriteBatch.End(). More digging later, I found a few posts like this one saying that the Tint parameter passed into each Draw() call is ‘remembered/stored’ for each vertex, which is exactly what I need.

So my question is, is there a way for me to store more information than just a 4-byte Tint per Draw() (per vertex)? And if so, how can I receive it in the shader?

(If any of what I said about SpriteBatch is incorrect please let me know :slight_smile: )

Hey, happy new year!

One thing that comes to mind that I also tested is to draw everything in a single batch, but do it a bit different. Have a RenderTarget pointing at a Texture2D that holds out several screens, we’ll call them layers. Such as maybe background, background effects, characters, foreground, foreground effects. That’s five layers and each of them should be the resolution of your game screen, say 960 by 540. Just put them on top of each other, resulting maybe a 960 by 2700 texture.
Your update method should really set up everything for you so that draw just draws everything from a prepared state.
Your draw method should be split between several stages:
DrawBackground, DrawBackgroundFX, DrawCharacters, DrawForeground, DrawForegroundFX. All these should be surrounded by a SINGLE batch start/end.

Then, change your render target and draw to the screen from your buffer all the layers in order.

In a perfect world, you would draw Background and Foreground just once and then touch them again only if you scroll. Characters would be drawn way more often since they move more often. FX layers would be drawn also often since I expect them to hold moving stuff such as waves, tree vegetation moving in the wind, etc. This means management of what tiles go in which layer.
So you also need to have flags on some layers that prevent redrawing since the content won’t change.
The advantage is that you draw only what you need and (remembering my past projects, minus any shaders, I did reach 500 fps and even more on complex scenes).
Also, using this buffered method, you can easily implement zooming since you can draw scaled to the target screen.
The disadvantage is vertical layer bleed. Horizontally you’re fine to draw from or to off screen, for instance a tree that’s partially visible, but vertically you have a problem. Either make sure you only draw cropped pieces or space out layers on the texture, thereby introducing a bit of waste.

If you are inclined to consider this solution I strongly suggest making a prototype first, don’t try to do it directly in your code. You need to test first, maybe adjust, maybe bring in some new ideas you might think about during this prototyping and you need to have a small, workable prototype for this.

Hope this helps.

Oh, missed one important thing. Since it’s a top-down view, you want to make sure that your characters are sometimes behind a tree and sometimes in front of it, depending on the Y, so you’d basically draw everything that you know it has a variable position on that “characters” layer with sorting. The spritebatch will do the rest.
But you do know which tiles will always be in the back (ground) and if you have an UI you always know that will be in front. So you can still successfully use this method saving up draws.
Here’s an example of an older project of mine. Still needs to be finished as a game, but the engine implements exactly what I suggested and it works great.

Hey! Thank you so much for the detailed reply :smile: !

I considered drawing everything on a single render target, but since my resolution (1920x1080) is quite high, and I also have a lot of layers, I would need to make a very very large render target to keep them together. Also, my bloom shader and blur shader would, as you mentioned, cause layer-to-layer bleeding even if I can cull the textures correctly. But, as you said, I guess some padding would solve that, and having a large render target probably won’t be a bad idea.

But my biggest problem with your approach is how I can actually render so many effects, where each entity in the world may have its own sets of shaders and parameters?


The current render engine behaves like this:
(“object” here means non-tile objects. and “target” here means render target)

  1. Sort every reflectable object by y, render them up-side-down on target1.
  2. Sort every emissive object by y, render them on target2.
  3. Render some reflective/emissive effects like shooting stars at night onto target3. (reflects in water at night and emits light)
  4. Render all tile bases, such as water tiles, ice tiles, grass tiles etc. All those tiles are rendered onto a frameTarget (where everything is drawn onto before drawing to screen, used for screenshots). targets 1, 2, 3 are all sent as texture parameters to shaders that render special tiles like water.
  5. Render all tile transitions, same process as 4 for special tiles like water.
  6. Sort every object by y, render them directly onto the frameTarget, so that objects appear above tiles.
  7. Render particles directly onto the frameTarget.
  8. Create a lightmap from emissive render target and tile lighting, stores into lightMapTarget. A lightmap is a black mask, and is “carved” out light by tiles and emissive objects. Shaders are used to make the lighting smooth and colorful. The actual process of lighting is a bit more involved to achieve what I want.
  9. Apply more shader effects onto the lightMapTarget, like fireflies at night.
  10. Draw the lightmap onto the frameTarget.
  11. Draw UI onto the frameTarget.
  12. Draw frameTarget onto screen.


In this screenshot, you can see all kinds of effects together, like particle lighting, reflective water, emissive tiles etc. I plan on making more shader effects in the future.

The tricky thing is, for steps 4, 5, 6, 7, 11, every entity in the world (tile, player, enemies, vegetation, buildings, UI, etc), have their own combination of shaders and parameters. For example, different liquids in the game have different “wave speed” and just the player alone can have different shaders for different body parts (like dye in Terraria), so there are a lot of combinations of shaders and parameters. The emphasis is that EVERYTHING can have their own shader parameters, (leaves, water tiles, fireflies, player head, player feet, some UI button, particles etc).

If I render them all onto a single render target, how can I maintain/store/remember those parameters within one batch?

(P.S. your game looks awesome!!)

Ah, right! Sorry, I think I misread and misinterpreted the initial message/screenshot. Yeah, what you’re describing a bit more complex to handle. But first of all, I’d like to ask about few things that can help me get a bit more clarity.

  1. You mentioned that your resolution is 1920x1080, but the screenshot basically uses 480x270 on top of which I assumed the broken pixels come from a shader that does some effects on. Is your scene meant to be “basically” 480x270 and you want shaders on top of that?
    By the way, coincidence makes it that I also found that exact resolution to be optimal for games I am developing and also it’s the native video resolution of a retro emulator I am working on. So, if you could use a bit of confirmation, I also found this to be the best balance between retro look, resource spend and modern monitors compatibility.

  2. For now I will assume you are indeed working with a base resolution of 480x270 since the screenshots seem to suggest that (ignoring UI which can be, offcourse, scaled over at a different resolution). Given that, do you plan on implementing camera zooming on your scene, let’s say, like when you want to set up an establishing shot that takes a larger overview of a scene, then zoom back in at 480x270? i “think” the game “Inmost” does that. At the very least, it definitely works with “subpixel” coordinates/scrolling.

  3. Colors. Do you plan on using pixel art style? If so, you need to be very careful with shaders that may end up oversaturating portions of the screen (where effects crowd in) outside a resonable palette that you do need to respect as much as possible. For instance, when darkening something, it’s not sufficient to just reduce RGB proportionally (i.e. overlay with transparent shades of grey to black). Instead, you want to add a bit of blue when you darken and a bit of yellow when you lighten.
    I think that is really posible with shaders, if you program them in such a way that you can control the palette of colors they can blend to.

  4. Can you please provide a video that shows what your shaders do in action? I mean, I’d like to see in realtime the water/reflections/lighting to get a better feel about this. I’m also curious if you want to go in such a detail such as if, for instance, some sparkle explodes under a tree, would it be expected to light the ground and part of the tree bark, but the leaves should get darker as if the sparkle is beneath?

  5. Where are you drawing from? I assume a single texture atlas. Do you cache the mirrored reflection tiles or do you calculate them always realtime?

  6. And, not least, how large will your world be? Will it be seamless or “zone”-based?

That’s all I can think of for now. I hope you don’t mind I am derailing you a bit, you gave quite clear details on implementation requirements, but sometimes I feel that some questions may need answering the questions beneath them, if I make sense with that. :slight_smile:

Thanks!

Hey! Here’s a quick respond to your questions:

  1. 1920x1080 for different character and object sizes (characters can be scaled by shrink abilities for example).
  2. Scaling view is not considered right now, and wouldn’t be hard to do, just some projection, no need for render targets.
  3. Yes, pixel art. I’m already hue-shifting in the pixel art, but not in the shaders. I would also love to add more tone shaders in the future, and adjust the overall color curve based on time of day. But I must fix the unbearable performance first.
  4. Here’s an old video (can’t compile right now): https://www.youtube.com/watch?v=YyIi-z8mKu8 Skip to 30 secs for water, and 3:20 for night lighting. And yes, I want to have a lot of details (particles).
  5. Texture atlas, yes. I cannot cache reflection because the stuff that cast reflection are rotating or moving at all times. Vegetation sway in wind for example. Same goes for light shader, must recalculate every frame.
  6. 2000 x 2000 tiles at least (currently 500x500 for testing, but way too small for what I need). It is procedurally generated so I can’t just pre render the map. The map is also changing due to stuff like rain etc.

Let me what you think, but I really want to tackle these questions in particular:

  1. SpriteBatch.Begin() with Deferred does not record shader parameters for each BatchItem right? So even when I have a “master shader” that toggles specific effects based on a parameter, if I want different effects for different objects, I must use Immediate or group the objects together?

  2. If I am understanding correctly, the only way for me to “apply parameter” per batch item is to store it into the vertices? (The default struct for each vertex is VertexPositionColorTexture I believe, so I would need to make a different struct to hold more data) Is there a drawback to this approach? This would be the simplest to implement, and from my limited knowledge, can solve all the lag in my game by reducing batches.

Ideally, I wouldn’t change the render ordering of entities because the game is 4-year old and it’s kind of time-consuming to make big changes like that to the engine.

You should just create your own batcher. I’m writing a tutorial right now. It’s not yet ready but you can read the code:

Main thing for you is the FirstVertex.cs:

That allows you to put any information that you want in the vertex.

2 Likes

Hey! Thanks for the help. I was trying to do that but I didn’t know about VertexDeclaration. I will look into it more today and try to fix the code tomorrow :smile: .

1 Like

Thank you so much @Apostolique ! I managed to get it working after some more digging over the past 2 days. The shader wasn’t working, and I had such a massive headache debugging the shader. Turns out, the problem was not the shader but the custom vertex struct.


But basically, for those that can't get custom vertex shader input working, make sure your color is offsetting 4 bytes NOT 4 floats!!!

Here is a working vertex that passes an extra Vector2 to the vertex shader:

    [StructLayout(LayoutKind.Sequential, Pack = 1)]// <-- that's for alignment I think
    [DataContract] // <-- you don't actually need the data contract, but MonoGame has it so I put it here.
    public struct CustomVertex : IVertexType
    {
        [DataMember]
        public Vector3 Position;
        [DataMember]
        public Color Color;
        [DataMember]
        public Vector2 TextureCoordinate;
        [DataMember]
        public Vector2 FuncIndex;

        public static readonly VertexDeclaration VertexDeclaration;

        VertexDeclaration IVertexType.VertexDeclaration => VertexDeclaration;

        public CustomVertex(Vector3 position, Color color, Vector2 textureCoordinate, int funcInd)
        {
            this.Position = position;
            this.Color = color;
            this.TextureCoordinate = textureCoordinate;
            this.FuncIndex = new Vector2((float)funcInd, 0);
        }

        public override readonly int GetHashCode()
        {
            return HashCode.Combine(Position, Color, TextureCoordinate, FuncIndex);
        }

        public override readonly string ToString()
        {
            return
                "{{Position:" + Position +
                " Color:" + Color +
                " TextureCoordinate:" + TextureCoordinate +
                " FuncInd:" + FuncIndex +
                "}}";
        }

        public static bool operator ==(CustomVertex left, CustomVertex right)
        {
            return
                left.Position == right.Position &&
                left.Color == right.Color &&
                left.TextureCoordinate == right.TextureCoordinate &&
                left.FuncIndex == right.FuncIndex;
        }

        public static bool operator !=(CustomVertex left, CustomVertex right)
        {
            return !(left == right);
        }

        public override readonly bool Equals(object? obj)
        {
            if (obj == null)
                return false;

            if (obj.GetType() != base.GetType())
                return false;

            return this == ((CustomVertex)obj);
        }

        // Statis constructor sets VertexDeclaration, which is just
        // information of the layout of the vertex shader input struct.
        static CustomVertex()
        {
            int offset = 0;
            var elements = new VertexElement[] {
                new(OffsetInline(ref offset, VEOffset.FLOAT3), VertexElementFormat.Vector3, VertexElementUsage.Position, 0),
                // -------PAY ATTENTION TO THE FOLLOWING LINE'S OFFSET VALUE
                new(OffsetInline(ref offset, VEOffset.COLOR_RGBA), VertexElementFormat.Color, VertexElementUsage.Color, 0),
                new(OffsetInline(ref offset, VEOffset.FLOAT2), VertexElementFormat.Vector2, VertexElementUsage.TextureCoordinate, 0),
                new(OffsetInline(ref offset, VEOffset.FLOAT2), VertexElementFormat.Vector2, VertexElementUsage.TextureCoordinate, 1),
            };
            VertexDeclaration = new VertexDeclaration(elements);
        }
        private static int OffsetInline(ref int value, int offset)
        {
            int old = value;
            value += offset;
            return old;
        }
    }

Offset table class, just a class full of constants:

    /// <summary>
    /// Vertex Element Offset table.
    /// </summary>
    public static class VEOffset
    {
        public const int FLOAT = sizeof(float);
        public const int FLOAT2 = FLOAT * 2;
        public const int FLOAT3 = FLOAT * 3;
        public const int FLOAT4 = FLOAT * 4;
        public const int COLOR_RGBA = sizeof(byte) * 4; //<-- MUST be byte NOT float
    }

If you look carefully at the static constructor, I passed in the size of 4 bytes for the color, not 4 floats. I think the reason behind this is 4 floats would take too much space, and colors don’t need to be that precise.


AND in the vertex shader, make sure you do something like this for the vertex shader input. I found out (I think) that TEXCOORD means actual floats, whereas COLOR is converting bytes into floats. So if you need to pass in c# floats, make sure your semantic is TEXCOORD and not COLOR:

struct VertexShaderInput
{
    float4 Position : POSITION0;
    float4 Color : COLOR0;
    float2 uv : TEXCOORD0;
    float2 Func : TEXCOORD1;
};

This is now working, but if I’m wrong about anything please let me know :slight_smile: !

Nice that you got something custom working!

You can also use sizeof(float) for the color since that’s also 4 bytes. Just don’t multiply it by anything.

Something to note: If you pass different values per vertex for example in the FuncIndex variable, the shader will interpolate the value in the pixel shader. Could be surprising even though it makes sense.

1 Like

You SHOULD be able to simply use -1 as size to let underlying api sort out offset for you.

Ah, so it’s kind of like the default vertex shader, passing in different vertex colors would interpolate. Thanks for the information!

Oh really?! That would have saved me a lot of time :expressionless: , thanks for letting me know!

Good job and your game looks great! How much fps improvement did you manage to get?

Hey! Thanks for the compliment! I’m not sure as I only combined 4 of the 12 shaders so far. I will let you know when I finish the rest, but I have tons of university stuff to do atm.

I also realized some of the shaders cannot be put together. For example, my bloom effect consists of 3 shaders, and the reason I can’t put them together is they must read AND write to the same render target. So for example, shader 1 (blur) would render to render target, and then shader 2 would read from that render target and write to the same render target. And according to some sources online, render targets are updated not immediately after drawing on them or something, so I can’t do all effects in one DrawIndexedPrimitive() (which I assume is the root reason why multiple batches can be slow, as the function is uploading vertices to the GPU). I’m wondering if I can do them with multi-pass shaders, but that would require separate DrawIndexedPrimitive() anyway. But anyhow, the bloom shaders are used for post-processing, so will only render once every frame (probably not a problem).

1 Like

There is one thing I did for one of my unreleased games, though is not very efficient since it will cause draws outside the screen, I created almost a full screen tile map mesh each holding x*y tiles, and i applied the texture atlas and changed each vertex uv coordinates to each cell of the mesh, i had 9 meshes for all directions ready and depending where the player moved i created the extended meshes in background , so it was only one draw call for all the floor , but other meshes if rendered were also 1 draw call. Not sure how fast was it since I made that about 8 years ago and didn’t finish that game.

Thanks for the information! May I ask how you handled shaders with your tile system? If I’m understanding correctly, what you did is kind of similar to chunk-based rendering right?

yes, I made big chunks , each chunk was floor , and then rendered everything else on top , so the floor has the most number of tiles since it needs to cover the whole screen , so in the worst case scenario i had to draw 4 chunks at a time so 4 draw calls for all the floor and then spritebatch calls for everything else. I didn’t need much shaders at that time, as far as I remember I didn’t have water reflections, but I had some shadows, glow and other minor effects.

1 Like

I published the batcher article here https://learn-monogame.github.io/tutorial/first-batcher/

1 Like

By the way, you can see some of the images here and here when I was working on my tiling system back about 10 years ago, wow so long ago!
Perhaps one day I will redo all of that again better. I did that with XNA but basically I can re-use the code with Monogame including some shaders

2 Likes