Stats on this post
Total Read Time: Approx. 26m 8s according to my TTS app. But that includes the mark-down. Spent about two days writing this up lol. Word says 2293 words.
Stats do not include this section.
A Basic Non-Blocking FPS display
[Non-Blocking meaning it does not impact your FPS/drawing thread {well, not too much}.]
Welcome to the Overly Detailed Guide on Making an FPS Display and Spritefont Tutorial… I figured I may as well hit two birds with three stones [I know, comedic effect] … so, I hope this helps anyone needing a detailed guide on the matter at hand.
You can begin in Chapter One; the Prologue is just something worth mentioning.
I should add a handy link here
And I know I never used it in this post, perhaps in future.
If you are wondering how code highlighting works:
Selecting the programming language used in code blocks - Using Discourse - Discourse Meta
Prologue - Who Reads This Stuff? ¦ Assumptions About You
Open Prologue
To begin with:
Assumptions About You
Open Assumptions about you
I assume you already have Visual Studio 2019 {VS} [at this point in time] set up and have all the required components installed and ready.
I strongly advise you to take a gander over here: https://docs.monogame.net/articles/getting_started/1_setting_up_your_development_environment_windows.html
To Install the required components for VS and how to get MonoGame {MG} set up and running.
Feel free to ask for tips on how to use the NuGet manager to update your MG installation. I wrote a guide on it recently… somewhere…
Oh, I made a video… https://www.youtube.com/watch?v=gXC0uYh7OVQ&list=PLKTfNvOk8stZ2b4BV6Z4fTaEQyWITk_QI but it’s more about setting up Visual Studio… and me blabbering on for half an hour…
Part two in setting up an MG project is here: https://www.youtube.com/watch?v=mkdrKQ0s6W0&list=PLKTfNvOk8stZ2b4BV6Z4fTaEQyWITk_QI&index=2
I should really redo those videos… and create a video on installing MonoGame via NuGet… or something…
In short, I assume you have your development environment ready to go and you have already run a Hello World app to ensure everything is working.
I also assume you are on Windows 10 and will be using a UWP Project.
I should point out that this code is not optimised, and not fully commented.
Chapter One - Getting Started ¦ Your Project
Open Chapter One
Let’s begin with the blank project template for MG.
-
Start Visual Studio 2019.
-
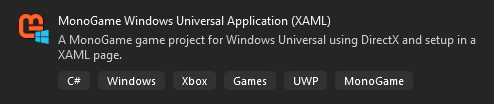
Create a new UWP MG XAML Project, name it whatever you wish to name it, the name of mine was Game2. Select this project template like so:
- At the top of your screen, select
x64[It may be on ARM by default] and clickLocal Machineor hitF5to build your project and ensure everything is working, this will also speed up your nextF5hit. The section in question:

Close the running Game2 [Or whatever your project was named] game window.
To begin with, we require a Font… so, let’s make that! Head on over to Chapter 2 for that.
Chapter Two - A Font, My Kingdom for a Font ¦ Making a Spritefont!
Open Chapter Two
OK, so I assume you are familiar with the Content.mgcb… no? let me explain how to find and open it.
Side Note on the MGCB NuGet setup
It is buggy but make sure you ran the command-line script relating to it, found here
Here is it in case the link breaks in future
Install MGCB Editor
MGCB Editor is a tool for editing .mgcb files, which are used for building content.
To register the MGCB Editor tool with Windows and Visual Studio 2019, run the following from the Command Prompt.
dotnet tool install --global dotnet-mgcb-editor
mgcb-editor --register
My understanding on this is, it is so you can open the Editor by clicking the Content.MGCB file in Windows Explorer rather than Visual Studio. Despite what I wrote later on.
First steps to creating a Spritefont
This section helps you understand the various parts associated with the tools required to create a Spritefont, so kind of a workflow structure
Just making sure I cover one step here, a Spritefont is a single image that holds the text your game engine will display to the user, it also helps circumvent certain other issues, more on that later.]
So, in your solution explorer, expand Content:
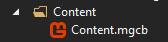
Right click Content.mgcb and select Open With...:
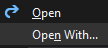
Select mgcb-editor-wpf [It may be default already if not we do that here again anyway], click Set as Default on the right and click OK to open the editor. Sometimes you may need to repeat this process [you can skip the Set as Default part and just hit OK] if you close the editor, so refrain from closing it until you close VS. The hope is that it opens when you double click Content.mgcb in Solution Explorer. More on that shortly.
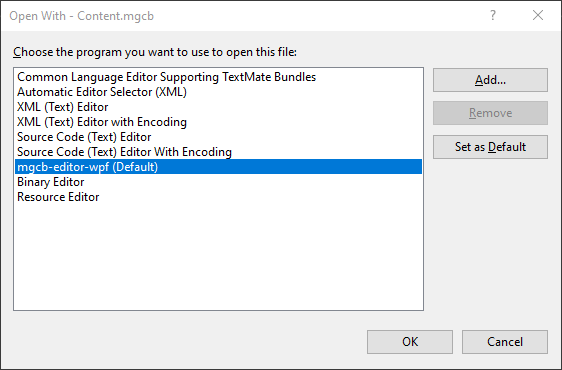
It can take a hot moment for the editor to open once you click OK above.
You should see this:
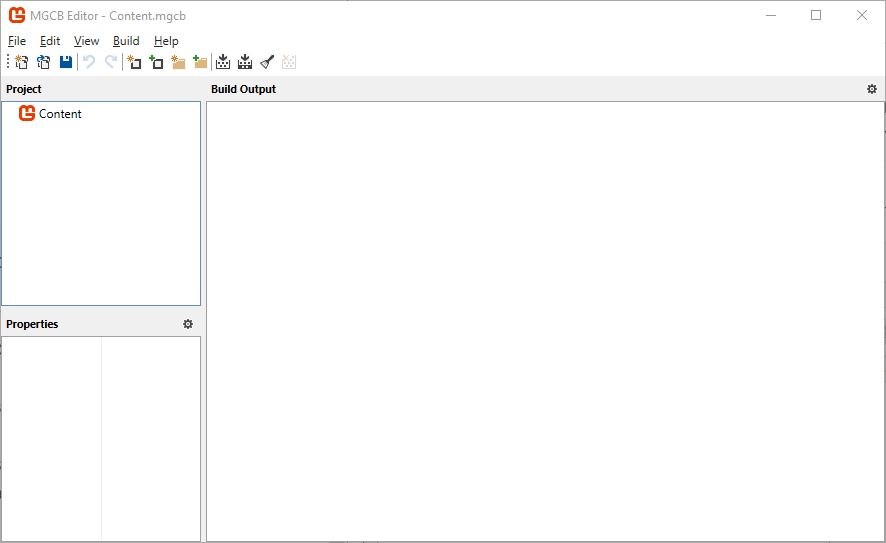
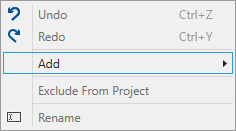
Click Edit>Add> in the command bar:
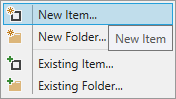
Select New Item:
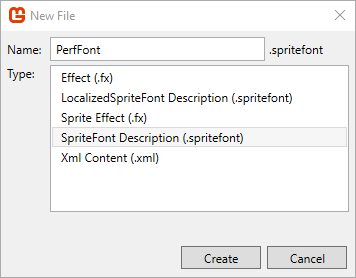
Rename File to PerfFont and select Spritefont Description (.spritefont) and then click Create below.
Side Note On That File Name
You can name it whatever you like, it is your reference to the font, and it has no relation to the font that will be embedded within it later. Though it doesn’t hurt to include a reference to it if it helps with development.
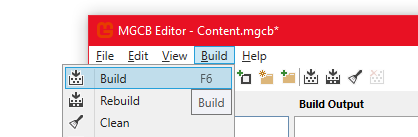
Next, you build everything… Click Build>Build or simply hit F6, like so:
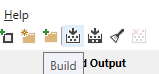
You can also use one of the shortcut icons:
Once built, you should see the following:
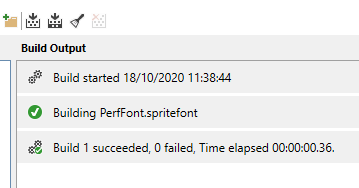
Should you see anything other than the above, post a support request on the forum, but do try hitting build a few times before doing so.
Specifying the font, we want to use to create our Spritefont
In this section, we dig into the file which assists in creating the Spritefont we wish to use, we also specify the display size of the font
Next, we need to modify the file created, return to Visual Studio and right click the Content folder in solution explorer:
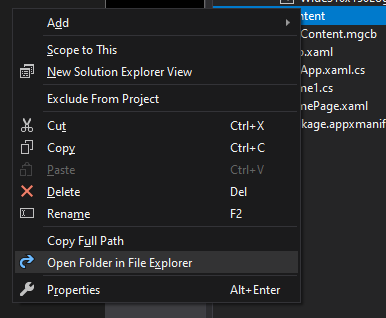
And select Open Folder in File Explorer.
Where you should find the following items [You can ignore the folders for the purposes of this tutorial, but do not remove them]:
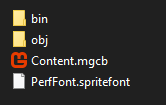
Right click PerfFont.spritefont:
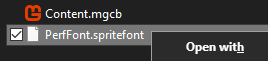
And select Open With
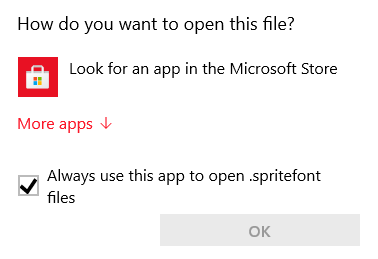
It is up to you if you keep that check box ticked there, I usually untick it so I can change the tool easier in future. Click where it says More apps.
I use another text editor but for the purpose of this tutorial I shall use Notepad:
Select Notepad or your preferred editor if you have one - or open it using your preferred editor- and click OK.
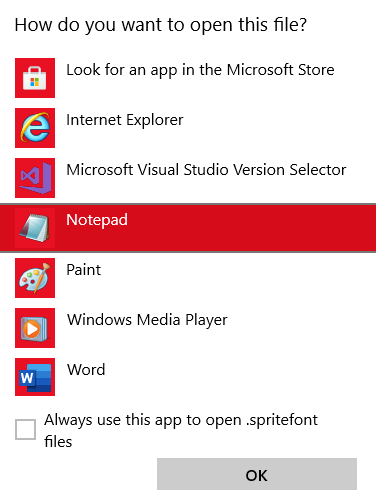
Once you open this up, we are only concerned at this point in time with the top section as below:
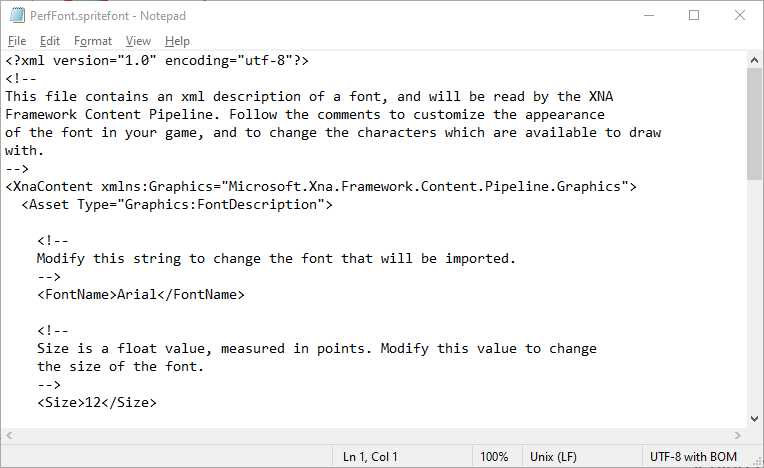
First up, we want to change the font type:

Change FontName to Segoe UI or whatever font you prefer, though it must be one that is installed on your system:
<FontName>Segoe UI</FontName>
SIDE NOTE! There is a whole discussion on Fonts and Game Development
Obligatory IANALS. I Am Not A Lawyer/Solicitor.
Keeping this one short. Basically, when using a font in your game, you must ensure you have a licence for every scenario that font will be used and if not covered by one, you should purchase one. Unless you created it.
This is in no way a complete explanation and you should do your own research on the matter.
With a quick web search for the topic at hand in this detail panel I found:
Font licensing for commercial use | TypeType®
Which lists a Videogames licence with a PDF viewable here:
https://typetype.org/upload/iblock/a81/License%20for%20Videogames.pdf
Discovered through this search query. [got to love typos]
Remember, you still require a licence even if you create a spritesheet, and the licence must cover videogame use.
If in doubt, seek legal counsel.
And because I like things to be readable for people like me… let’s set the font to size 16 like so:
<Size>16</Size>
It should now look like the following:
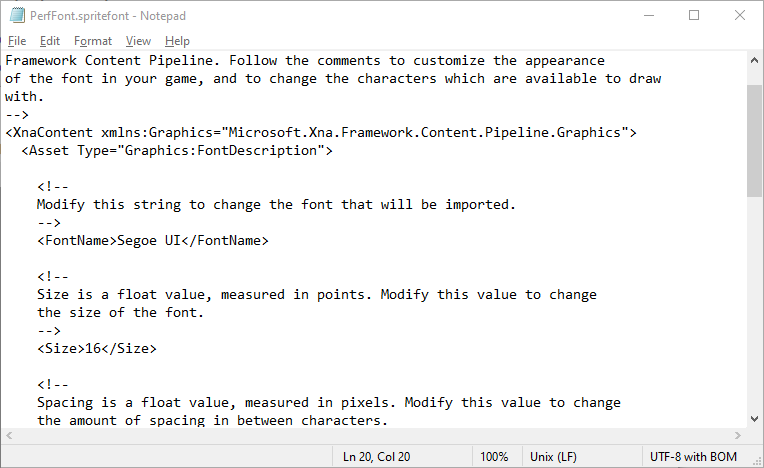
Save the file and close it.
Go back to the MGCB Editor and hit build again. Leave the editor open and minimise it, if you wish to play around with more font styles or sizes; repeat the edit and build process where you change the font name and the size to use a different font type/size. Remember to hit build in the MGCB Editor whenever you change the Spritefont data.
Once again, should you see anything different, post a support request on the forum, but do make a search for previous related issues first, before creating a new topic.
Finishing up this Chapter
In this section we ensure everything is working thus far
Head back to Visual Studio again.
Now a bit of a side tangent, but if you managed to open Content.MGCB inside Visual Studio, you should be seeing the following, I am adding this here for completion:
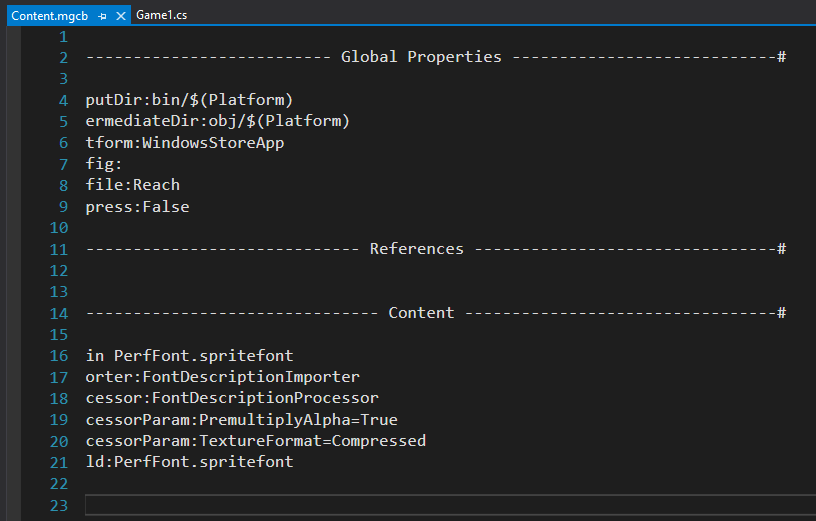
Anyway, with that mentioned, let’s hit Build/Run or F5 in Visual Studio, here is that button again for a reminder:
Avoid hitting the drop-down arrow.
Did you see your CornFlowerBlue window? good, close it again.
Now, we want to load the font into our Visual Studio project.
Head on into Chapter Three.
Chapter Three - Seeing Things ¦ Displaying the Spritefont
Open Chapter Three
Now that we have a Spritefont ready to go, we need to load it into our game engine.
So, let’s get started!
Adding supportive fields to the Game1 Class.
This section adds fields to the Game1 Class
In Visual Studio, open Game1.cs.
Just so that you are forced to type the following into the program, I will use images here. It should help you get used to memorising the code.
Just below the default SpriteBatch, enter the following:
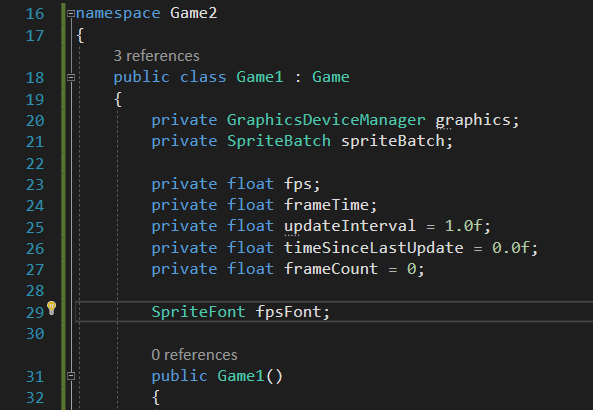
I have included surrounding code, so you know precisely where to enter the code, further code snippets will also include some surrounding code for orientation purposes.
We will have a float struct for the following fields:
- fps
- frameTime
- updateInterval with an initial value of 1.0
- timeSinceLastUpdate with a default value of 0.0
- frameCount with an initial value of 0
And a Spritefont:
- fpsFont
Which we will use later in the program.
Disabling frame rate limits and turning off VSync
In this section we disable the frame limits and synchronisation with VSync
Next in the Game1() method, we add some code to disable the refresh rate sync and uncap the 60FPS limit, however, this is not required for all projects, only for this current project so we can see how many frames our graphics systems can process with just CornFlowerBlue showing:
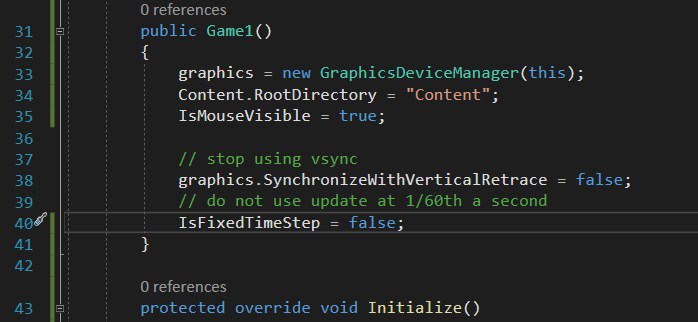
Next, we load our Spritefont.
Loading in the Spritefont we created earlier
In this section we enter the code to load our Spritefont
In the Initialise() method, we make no changes.
Just past Initialise(), within the LoadContent() method, we load our font like so:
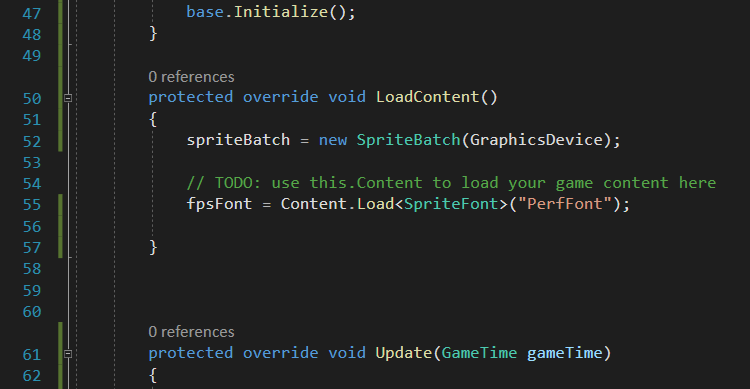
Note that we do not include .spritefont in the name of the font file.
This part has now given us access to the font within the engine, let’s see about displaying it next.
Adding code that helps with the FPS display
In this section we add some code to help with the FPS being displayed
But before that, we require some additional code to give us some data to utilise for the Frames Per Second display.
Move into the Update() method.
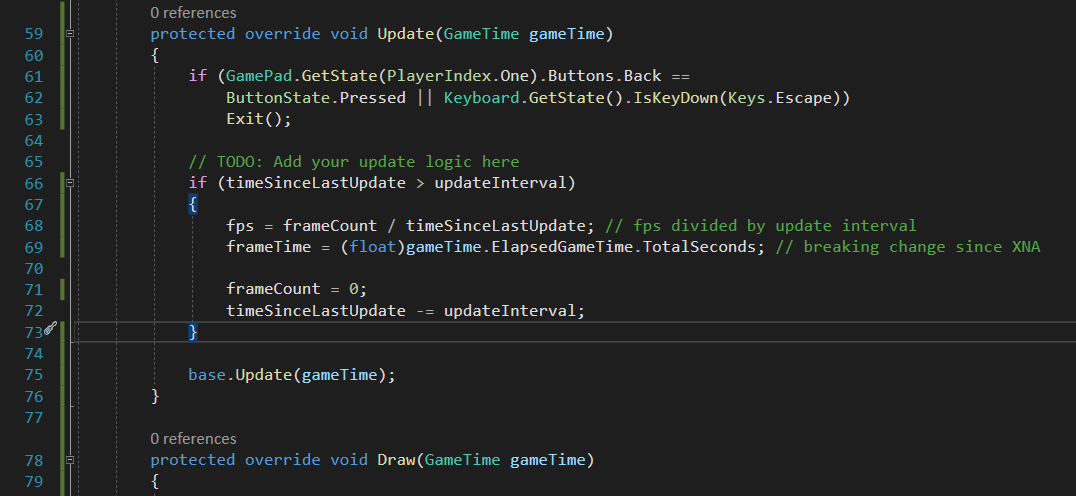
This code just assists with some metrics which we use later to display the information we require for the purposes of this tutorial, though it is also useful for the FPS display in your projects too.
Next we add the drawing code to display the FPS on-screen.
Showing the data on-screen
In this section we add the drawing code to the Draw() method
Moving along into the final part, the Draw() method.
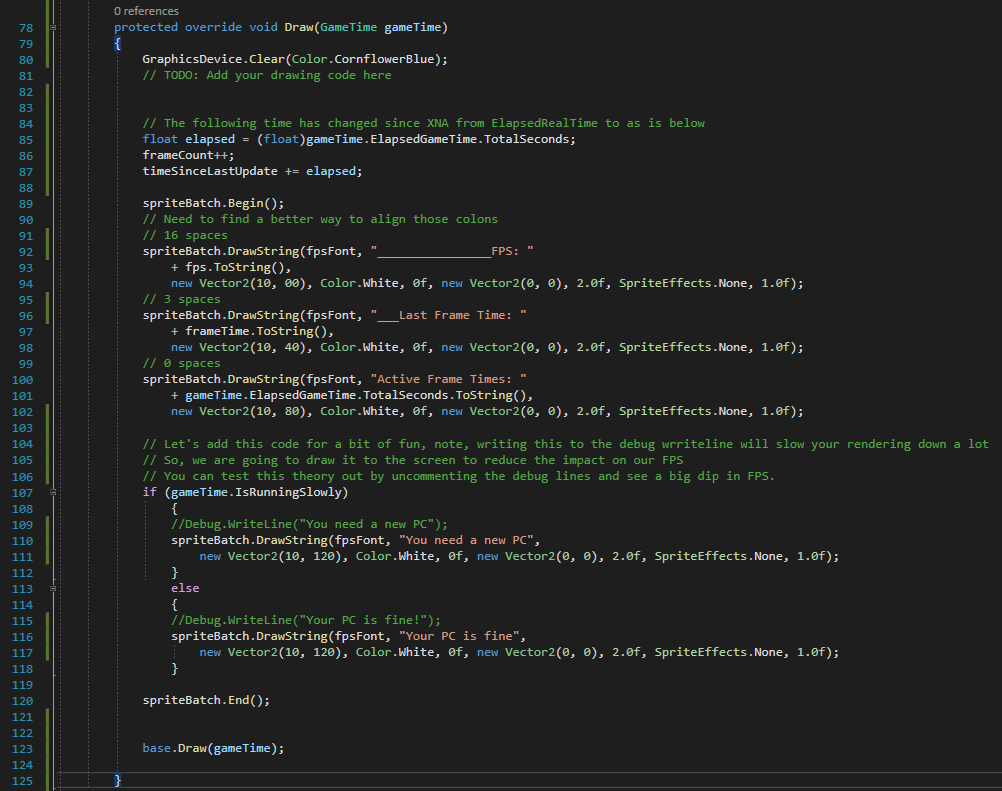
Since this is a huge chunk and the image becoming tiny to read easily, I will break it down a little, so ignore the above image and let’s look at what is happening in bits…
First, we are taking a snapshot of the time…
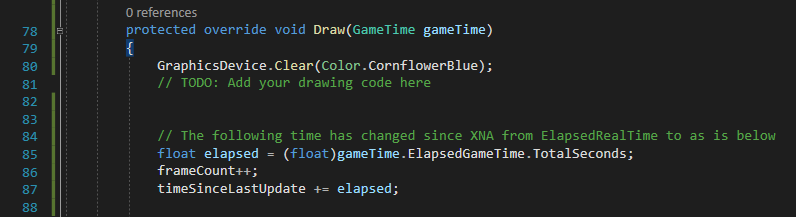
Then we begin our SpriteBatch to utilise our Spritefont to draw the FPS to the screen.
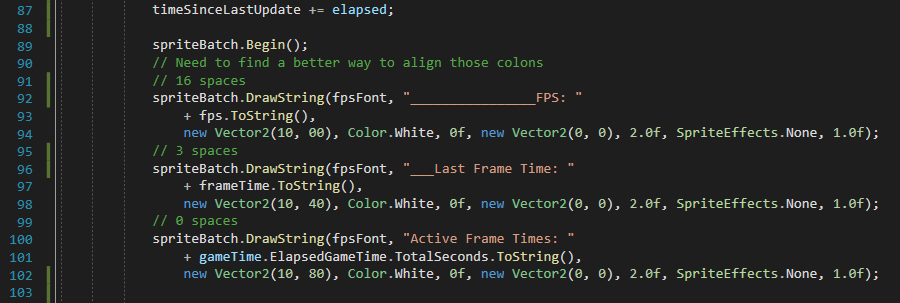
Notice the underscores? _ I used them just for visual effect, you don’t have to use them if you don’t want to, but you will see it makes the data more visible, though I may improve the code in future.
And finally, the last bit we all want to see clearer…
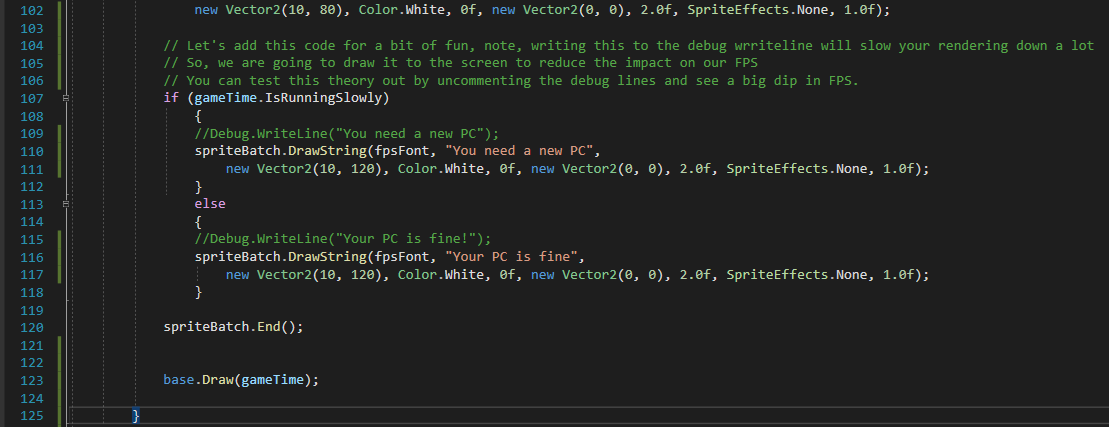
This is not required for the program to work, I just added it for fun when I found the code…
Notice the commented out WriteLine code, this was something I discovered drastically adjusted the drawing rate, no matter where I put the code… I believe when I placed it in Update() I still had a dip in FPS, so until I find another method for active data metric storage, this should work for now. I will be creating something for that in the future.
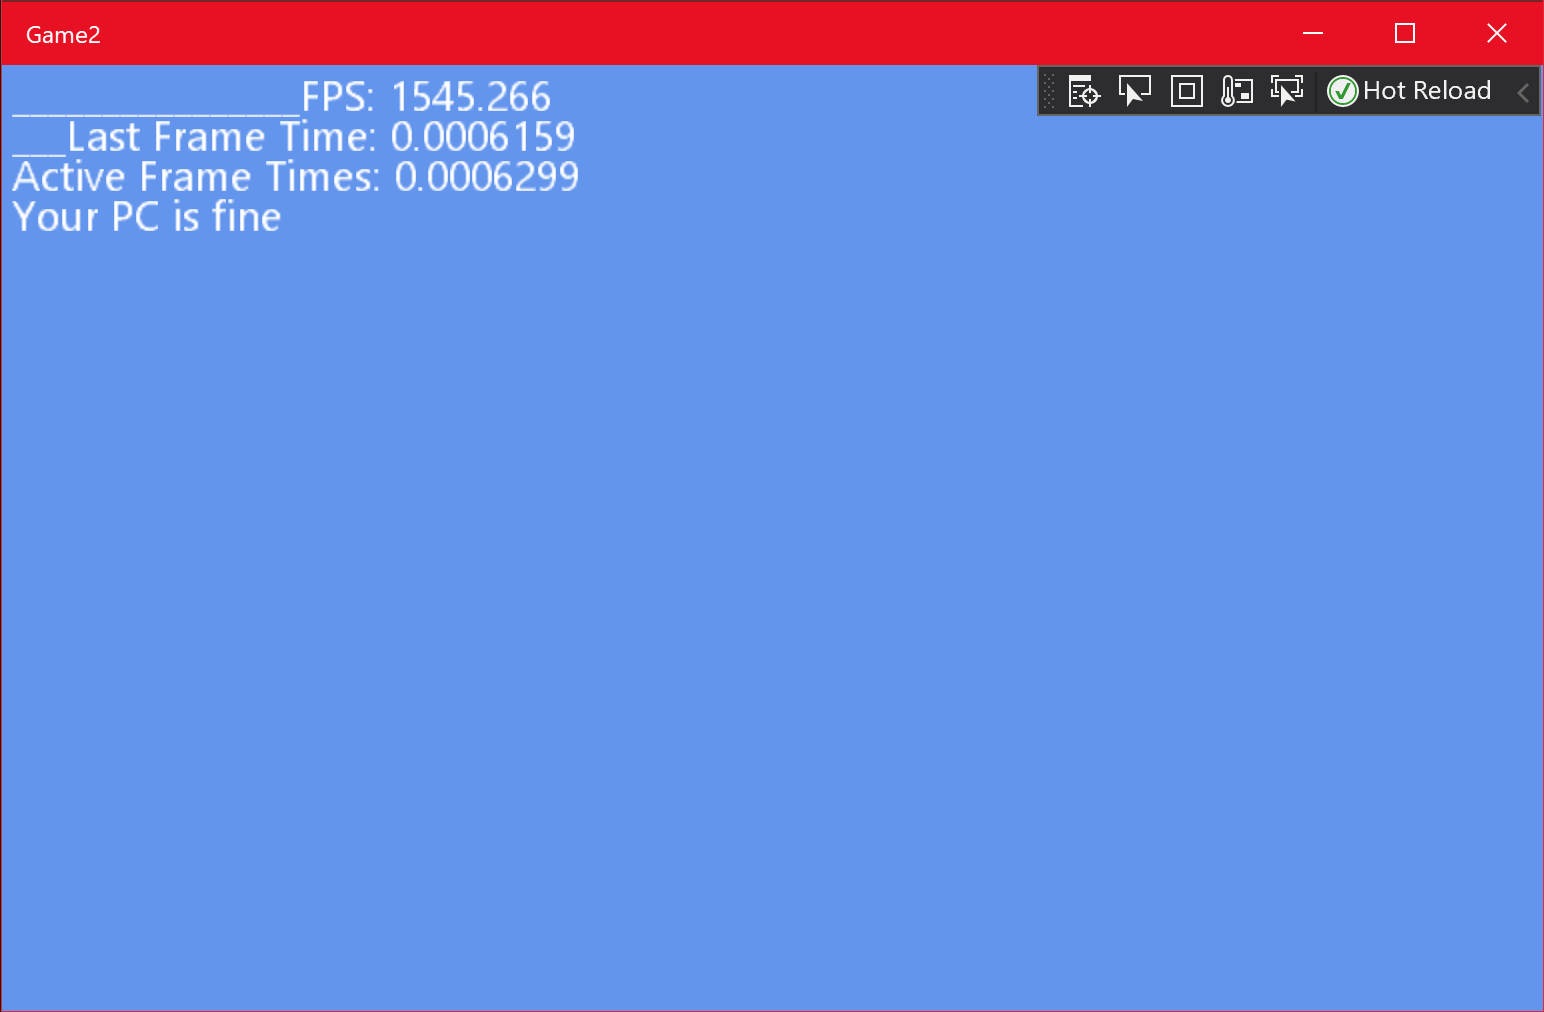
Did it tell you; you need a new PC?
And that concludes this tutorial.