Why Doesn't My Simple Subtractive 2D Lighting Work?

Hi!

I’m trying to create a simple subtractive 2d lighting setup and it just doesn’t seem to work? Namely the part where the subtract blend state comes into play.

The strategy is as follows. First we start with drawing the main game:
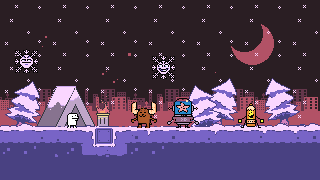
s1

On top of that we start with something like the below. (Black is light, white is shadow)

s2

And then we draw that on top of the main game and use a subtractive blend mode. And it’ll look something like this:

s3

For whatever reason with my implementation everything works except for the final step where we subtract the light stuff from the main stuff. I’m just getting a black screen.

Below is my code, anyone know why this might not be working for me?

Thanks!

My subtract blend state

    public readonly static BlendState blendStateSubtract = new BlendState
    {
        ColorSourceBlend = Blend.One,
        AlphaSourceBlend = Blend.One,

        ColorDestinationBlend = Blend.One,
        AlphaDestinationBlend = Blend.One,

        ColorBlendFunction = BlendFunction.ReverseSubtract,
        AlphaBlendFunction = BlendFunction.ReverseSubtract
    };

My draw function

    protected override void Draw(GameTime gameTime)
    {
        Time.UpdateDraw(gameTime);

        Graphics.GraphicsDevice.SetRenderTarget(null);
        Graphics.GraphicsDevice.Clear(ClearColor);

        // Draw normal stuff

        spriteBatch.Begin(
            sortMode: SpriteSortMode.Immediate,
            samplerState: SamplerState.PointClamp,
            transformMatrix: null,
            blendState: BlendState.AlphaBlend
        );

        spriteBatch.Draw(
            texture: Lib.GetTexture("Snow"), 
            position: Vector2.Zero, 
            color: Color.White
        );

        spriteBatch.End();

        // Begin subtract draw

        spriteBatch.Begin(
            sortMode: SpriteSortMode.Immediate,
            samplerState: SamplerState.PointClamp,
            transformMatrix: null,
            blendState: blendStateSubtract
        );

        // Fill screen with White

        spriteBatch.Draw(
            texture: Lib.GetTexture("Pixel"), 
            position: Vector2.Zero,
            sourceRectangle: null, 
            color: Color.White, 
            rotation: 0f, 
            origin: Vector2.Zero, 
            scale: new Vector2(CONSTANTS.SCREEN_WIDTH, CONSTANTS.SCREEN_HEIGHT), 
            effects: SpriteEffects.None, 
            layerDepth: 0f
        );

        // Draw a light

        spriteBatch.Draw(
            texture: lightTexture,
            position: new Vector2(64, 64),
            sourceRectangle: null,
            color: Color.White,
            rotation: 0f,
            origin: new Vector2(lightTexture.Width / 2f, lightTexture.Height / 2f),
            scale: new Vector2(1, 1),
            effects: SpriteEffects.None,
            layerDepth: 0f
        );
        
        spriteBatch.End();

        base.Draw(gameTime);
    }

So I was able to get it working by moving the lighting stuff into a render target.

Though the strategy doesn’t quite line up with how I was originally trying to do it. As you can see I’m drawing a black circle gradient on top of a black cleared render target. I didn’t mean to do this, but it turned out to be the solution? This doesn’t make any sense to me, because wouldn’t drawing a black gradient on top of the black cleared texture do nothing? I tried clearing it with white and it stopped working…

This does what I need it to but it upsets me there’s something in my code base that I don’t understand. If someone could help me understand why this is working that would be great lol.

    protected override void Draw(GameTime gameTime)
    {
        Time.UpdateDraw(gameTime);

        // Setup lights

        Graphics.GraphicsDevice.SetRenderTarget(lightRenderTarget);
        GraphicsDevice.Clear(Color.Black);

        spriteBatch.Begin(
            sortMode: SpriteSortMode.Immediate,
            samplerState: SamplerState.PointClamp,
            transformMatrix: null,
            blendState: blendStateSubtract
        );

        // Draw a light

        spriteBatch.Draw(
            texture: lightTexture,
            position: new Vector2(64, 64),
            sourceRectangle: null,
            color: Color.White,
            rotation: 0f,
            origin: new Vector2(lightTexture.Width / 2f, lightTexture.Height / 2f),
            scale: new Vector2(1, 1),
            effects: SpriteEffects.None,
            layerDepth: 0f
        );

        spriteBatch.End();

        // Draw normal stuff

        Graphics.GraphicsDevice.SetRenderTarget(null);
        Graphics.GraphicsDevice.Clear(ClearColor);

        spriteBatch.Begin(
            sortMode: SpriteSortMode.Immediate,
            samplerState: SamplerState.PointClamp,
            transformMatrix: null,
            blendState: BlendState.AlphaBlend
        );

        spriteBatch.Draw(
            texture: Lib.GetTexture("Snow"),
            position: Vector2.Zero,
            color: Color.White
        );

        spriteBatch.Draw(lightRenderTarget, Vector2.Zero, Color.White);

        spriteBatch.End();

        base.Draw(gameTime);
    }

You just answered your own question haha, but yea that’s what you needed to do.

Without a render target, you’re doing this…

  1. Draw your scene.
  2. Draw over top your scene with a black rectangle.
  3. Draw your light over your scene to “cut out” the light part.

The problem is that step 2 overwrites step 1 in the buffer and then step 3 just cuts out a transparent light section on a black rectangle. If you’re rendering over black I suspect you just don’t see anything.

Instead, using a render target, you create that cutout of your light in a texture that’s black, giving it transparency where the light is. Then you render that over top of your scene which lets the scene show through.

So I think your changes are correct.

Gotcha, thanks for explaining it further. I was just kind of guessing heehee