Deferred Engine Playground - download

Hi guys,

GITHUB: https://github.com/UncleThomy/DeferredEngine

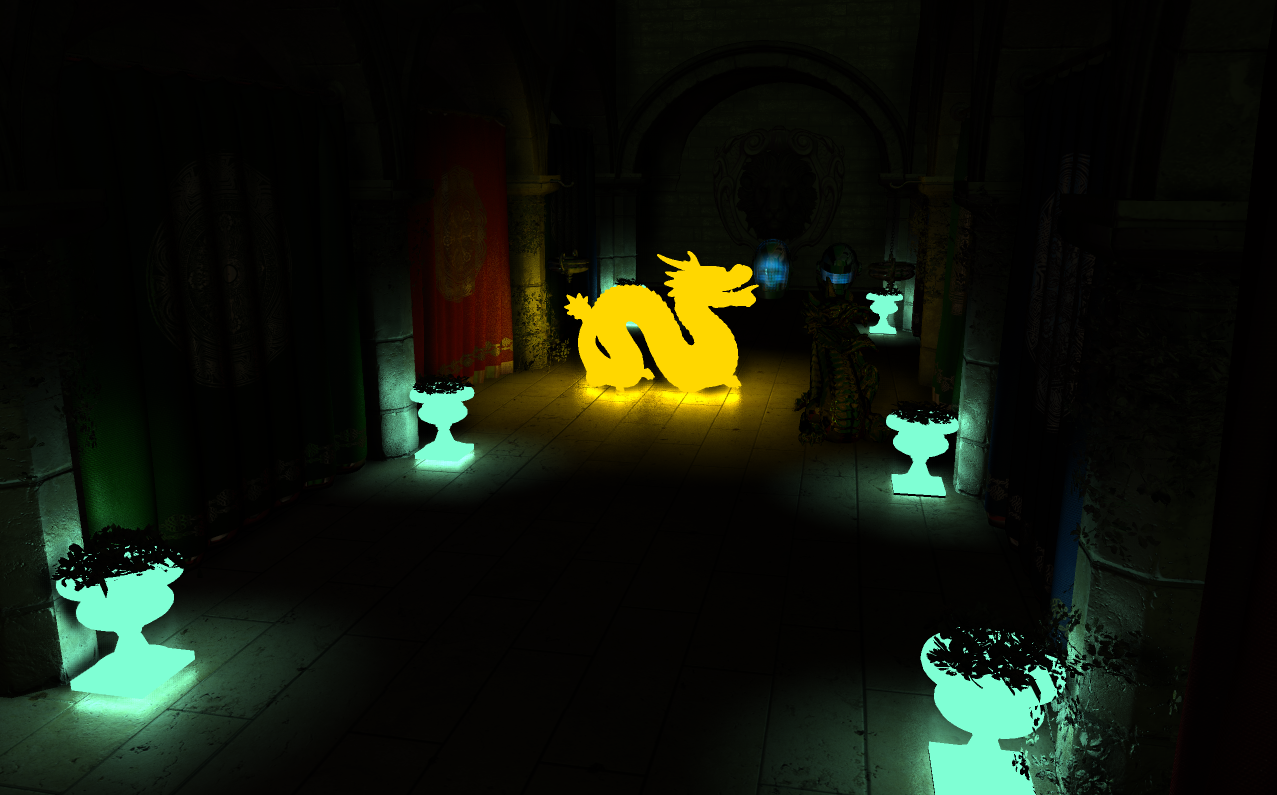
I reworked my deferred engine playground basically from scratch. It started out as a real fast way to make some models appear on screen, but now it has a bit more structure.

What it is:
It’s a scene setup which enables programmers to quickly try out new shaders in a deferred environment with a relatively easy way to import models with physically based materials`

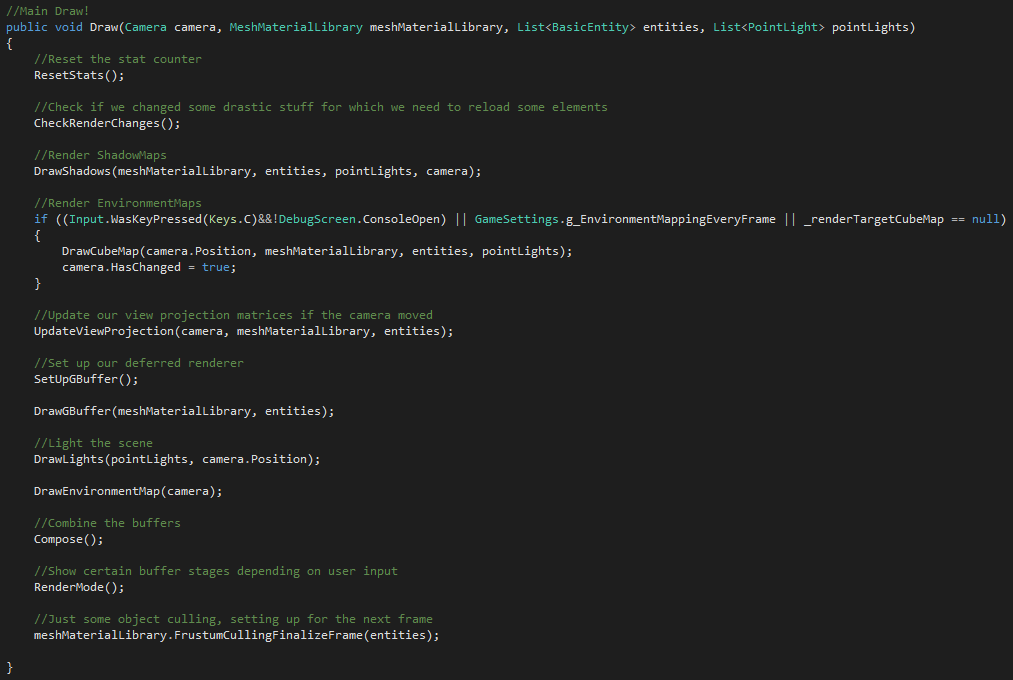
This is the main draw function. As you can see it’s pretty structured and easy to change the rendering or add some shaders.

Speaking of shaders and materials - it’s really easy to have special code for certain materials.
My GBuffer contains the following data:

  • Albedo
  • World Space Normals
  • Depth (z / w)
  • Roughness
  • Metallic
  • Material type

(2 x RGBA + 1x R)

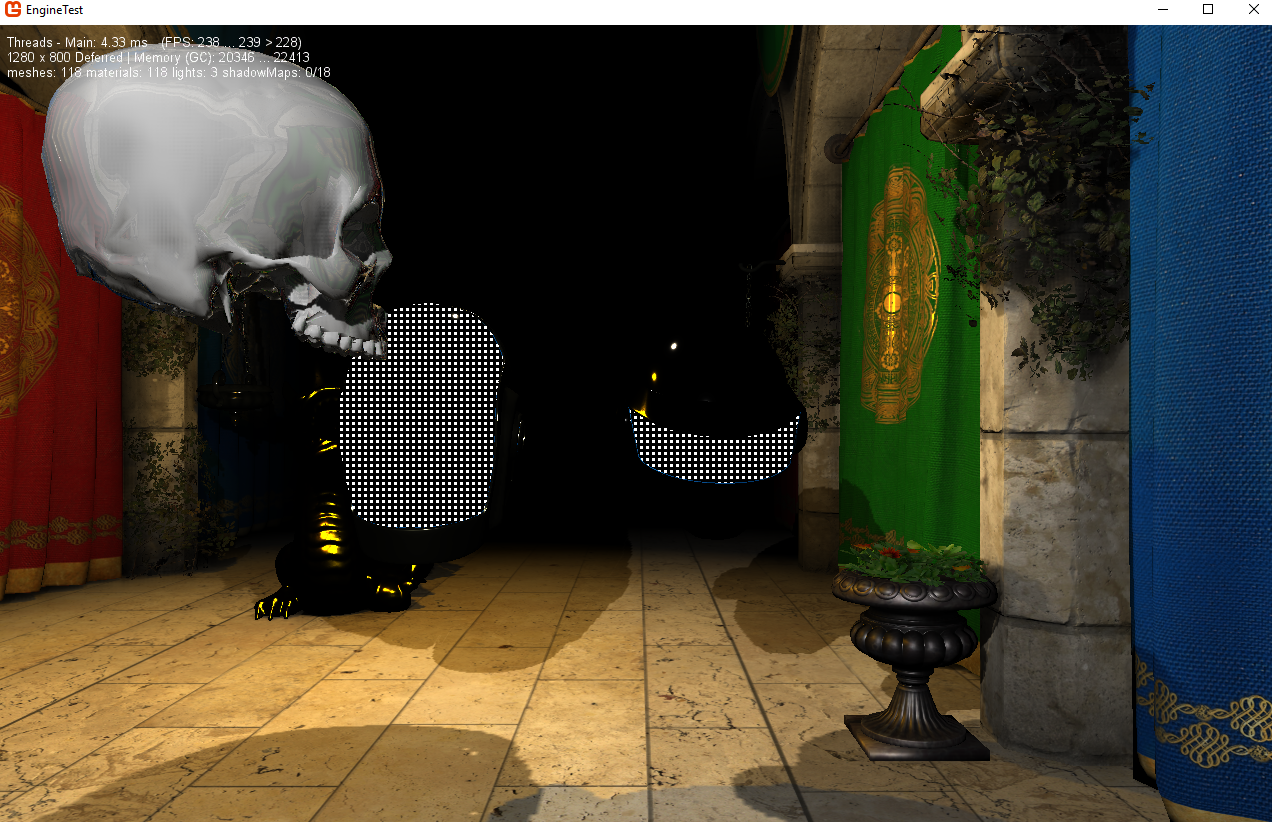
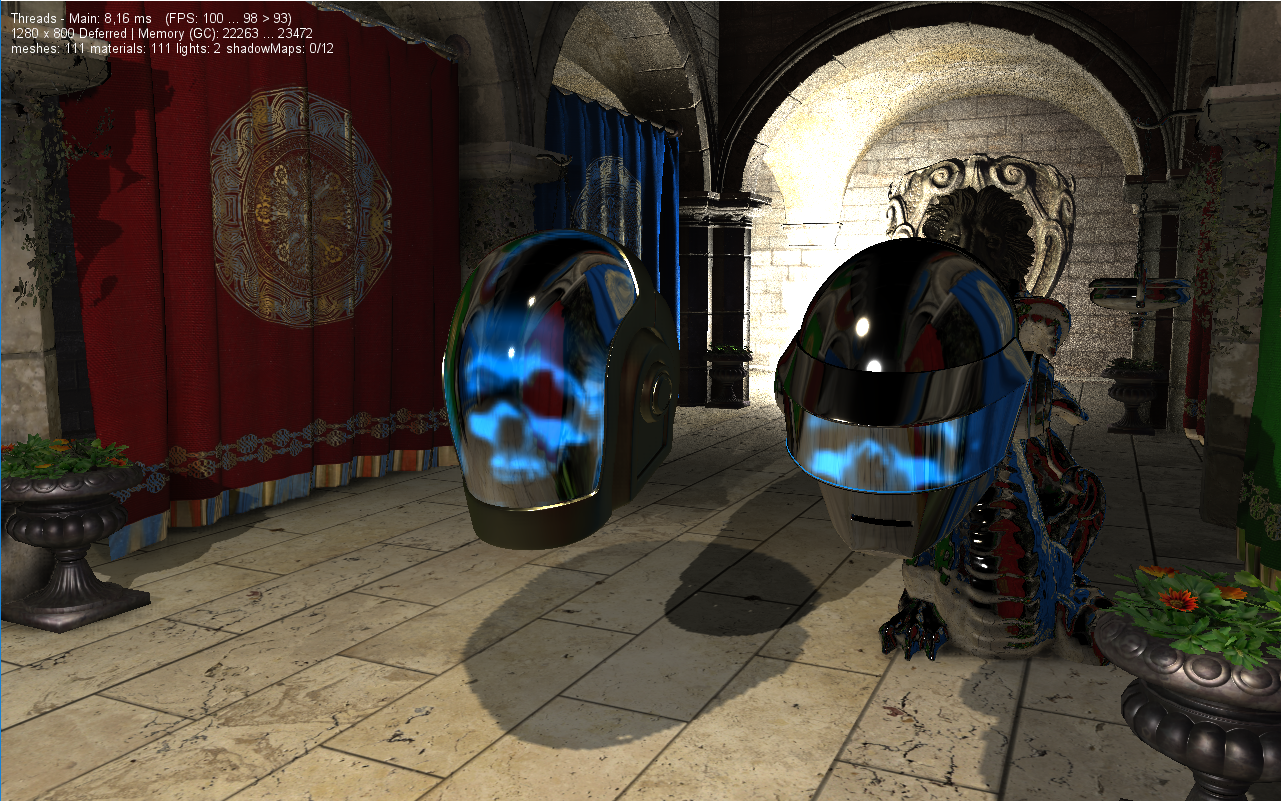
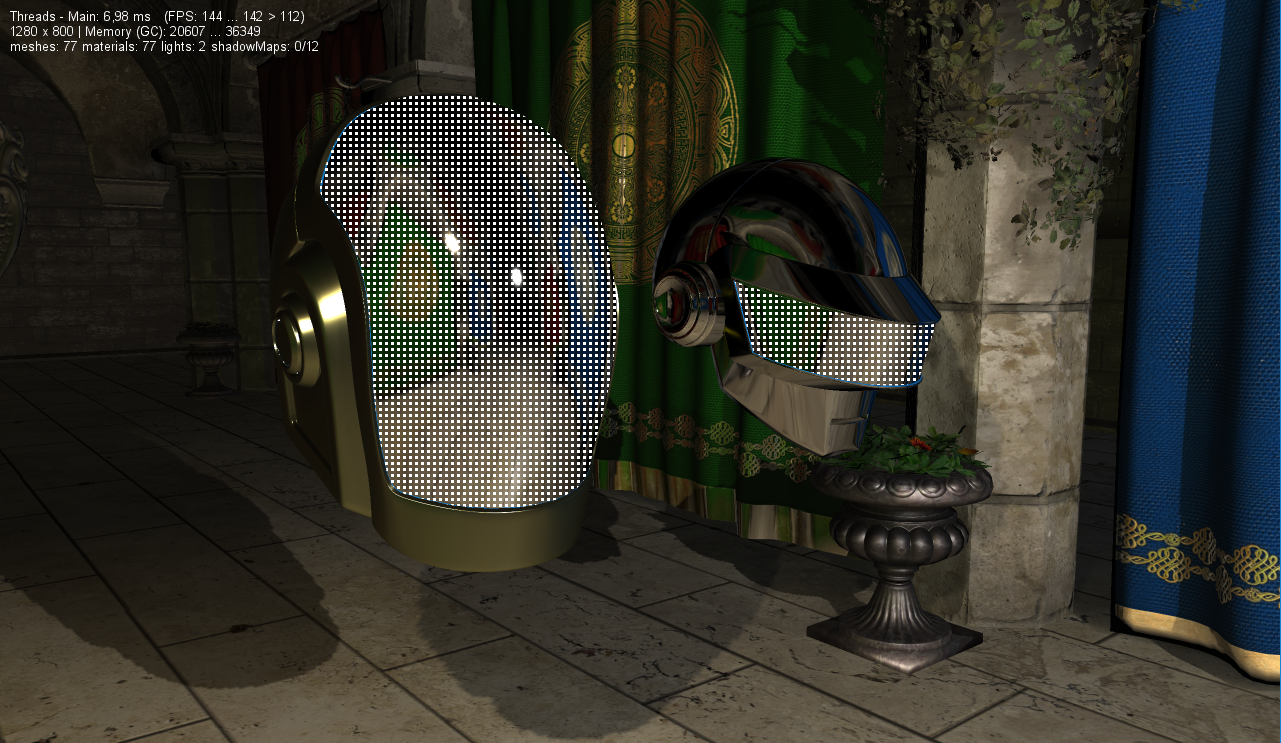
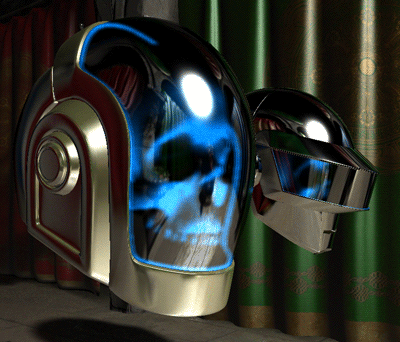
So you can simply set the material type of the helmet visor to an arbitrary number and manipulate pixels with this material type.
An example would be the helmets below which feature a spooky skull hologram made with a simple shader trick.

importing and using objects and lights is really straight forward as well.

public class Assets
        {
            public Model SkullTest;
            public MaterialEffect SkullTestMaterial;

            public void Load(ContentManager content)
            {
                SkullTest = content.Load<Model>("Art/test/skull");
                SkullTestMaterial = CreateMaterial(Color.White, 0,0,
                    albedoMap: content.Load<Texture2D>("Art/test/skull_albedo"),
                    normalMap: content.Load<Texture2D>("Art/test/skull_normal"),
                    roughnessMap: content.Load<Texture2D>("Art/test/skull_roughness"),
                    metallicMap: content.Load<Texture2D>("Art/test/skull_metalness"));

            }
}

And then to use in engine

public class MainLogic
    {
      
       ....

        public void Initialize(Assets assets)
        {

              Camera = new Camera(position: new Vector3(-80, 0, -10), lookat: new Vector3(1, 0, -10));
             ....

            AddEntity(_assets.SkullModel, _assets.SkullTestMaterial, new Vector3(0, 0, -10), -Math.PI/2, 0, 0, 1);
       }
   }

Culling etc. is handled in a pretty robust way, so you basically don’t need to worry about that.

Adding point lights is similarly easy (I have ditched spot and directional lights for now, they are easy to implement)

public void Initialize(Assets assets)
{
myLight = AddPointLight(position: new Vector3(2, 2, -20), radius: 50, color: Color.Wheat, intensity: 20, castShadows: true, shadowResolution: 1024);

}

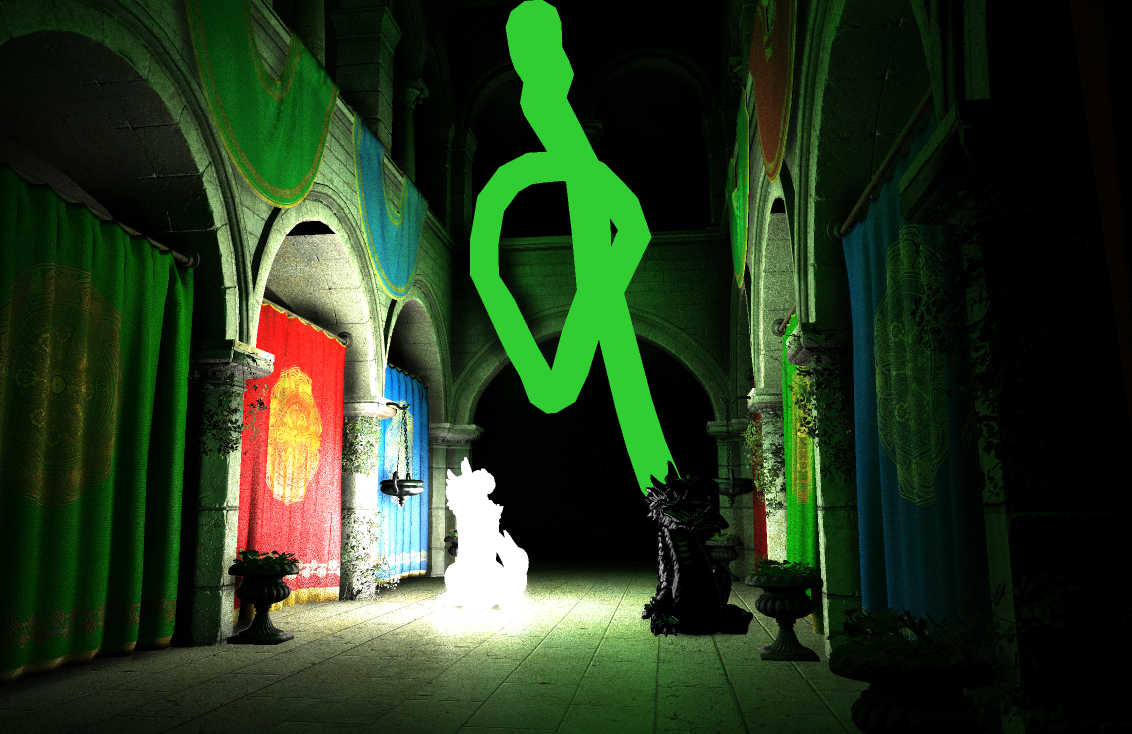
I am pretty proud of my frustum culling and shadow optimizations, which i did last night. In a static scene shadows cost almost nothing in terms of performance, which should be expected.

I use cubeMaps for the shadows of my point lights. They are not optimized to the end but have some neat stuff, like for example they will only update the faces that have changing geometry. So if an object moves next to a static light source only 1 or 2 projections are redrawn instead of all 6.

Typically game scenes don’t have millions of polygons around each light source, but with the Stanford dragon and the Sponza atrium, which are very heavy in terms of polycount, the cost for shadowmap generation is a bit inflated.

Nevertheless I can run 10 moving, fully updating lights with pretty big radii, at around 80Hz, which feels pretty good. These are soft VSM shadows by the way (not blurred)


Another thing that makes life easier is a working debug console with Autofill and suggestions

Plus the ability to drag and resize the window to your hearts content :slight_smile:


So yeah, just a pet project of mine. Basically redone last night and i like to write about stuff.

I am thinking of making this public if there is demand. It’s obviously still a bit hacky and not perfectly documented (and probably implemented) but it could prove useful maybe.

Anyways - ideas what to implement next?

11 Likes

Yes please :slight_smile: This is awesome!! I’m really interested in getting into graphics programming and I’m taking a graphics programming class this semester. Would love to do some PBR experiments with this.

By the way I’m working on getting glsl support in MG which opens the path to support shader stages besides vertex and pixel shaders in case you’re interested in that :smiley:

I think I speak for a lot of people when I say anything with shaders would be received with open arms! I have made a few attempts to get into it, but not managed to compile anything that works using hlsl. -There’s always some damn version conflict or outdated this or that, or the moon is out of alignment…

Looks like it might be a cool learning example for a lot of people, to say the least!

1 Like

Can someone give this a try? I think everything should be included

In case you get it to start you can use F1 to change render modes, the key above TAB for console (different in each language) and L to spawn new lights. move the existing light with arrow keys

Apart from that I implemented some form of SSAO. It sucks still, but it works, yay.

1 Like

Hi kosmonautgames,

some files are missing:
defaultfont.spritefont
stormtrooper.fbx
Stormtrooper_Albedo.png
Stormtrooper_Metalness.png
Stormtrooper_Normal.png
Stormtrooper_Roughness.png

alright thanks, I commited the change. There is currently a lot of trial/error stuff going on, but it should run fine

Now the build succeeds :slight_smile:

What “trial/error stuff” do you mean?

If possible, can you explain how the “spooky skull hologram” works?

I removed it from the main renderer since it’s not really relevant, but the idea is pretty simple.

Draw the skulls to another rendertarget. Set the materialtype of the helmet glass to 2.

Then in the deferred compose shader (where everything is merged into the final image) we look what material we are rendering. If the mat_type is 2 then we read the skull-rendertarget at the position, distort it or do some other effect, and add it to the output.

Man, this is really fantastic! I’d love to use something like this to play around with shaders!

You should readd it :wink:

Would love to see this in the renderer :slight_smile:

Finally tried it, runs without problems, and looks really nice! The code is much bigger than I expected, it will take a solid effort to get through, but it looks like it’s structured in a way that makes it possible to follow.

Thanks so far for sharing this!

I cant seem to add the skull holograms…
I can find the skull model, but I cant find the material map files. (???) Are they included?

Edit: So I can’t find the materials for the skull, but I can add a blank generic material, so the skull just comes out white.
…But the skull is drawn like an object in front of the helmet. not as a hologram on the visor. It looks like this:

Due to popular request I reimplemented the feature!

Yay!

I also implemented highly experimental screen space emissive materials

Plus some SSAO!

Let’s talk briefly about the “holograms”

With F1 you can cycle rendertargets, you can find the hologram rendertarget at 8th position or so.

You can change the rendering style with the console command g_HologramUseGauss true or not. If true it will use a gaussian blur to read from the hologram map.

In the assets I added a new material

hologramMaterial = CreateMaterial(Color.White, 0.2f, 1, null, null, null, null, null, MaterialEffect.MaterialTypes.Hologram, 1);

If you have a material with the type hologram it will only get rendered to the hologram texture.

To have materials project the hologram you need to set the materialtype to
MaterialEffect.MaterialTypes.ProjectHologram

In the assets class, where I load all my assets you can find the function ProcessHelmets(), where I assign specific material values to the submeshes of the helmet. You can see the visor uses ProjectHologram, while some outlines use Hologram, so they get incorporated.


Screen space emissive materials are inherently flawed but were a fun experiment.
Currently the limitation is that it doesn’t work with submeshes, basically it’s only good with a model with only 1 submesh. Change the objects material to have a type of MaterialEffect.MaterialTypes.Emissive to make it work.

g_Emissive … can change some properties.

new Console variables for ssao are also available, just type in ssao and see what’s there.

1 Like

Submeshes are now properly supported.

Hi
Do you know a good tool to generate pbr textures from albedo’s and normals other than substance which isnt free.
I m struggling with photoshop and loose a lot of time as i m not an artist
Other than that, impossible to get it working it fails on loading effects, but i have built them with monogamePT and rebuild in VS. Im using the latest dev version of mg win 7 + gt 620
Ill post the exact message of error when i arrive home in about 1h

there is minor problems Vector truncation etc. in shaders, which makes it throw warnings and not build (on the first try). I should fix that stuff. Regardless, it builds after the first fail, it ignores these warnings then, for me at least.

I’m not using the newest Monogame builds since they don’t work for me - I can’t load any effects, even if they contain almost nothing or are the base monogame ones. I’ve wasted countless hours on that, and there are several threads here that about that. Oh well.

I can’t recommend texturing programs apart from Substance Painter, I haven’t worked with anything else.

It builds under VS and PT, but when I start the app under VS, i get this error:


I’ll dig into it later after playin with my dog :slight_smile:

Yeah, that’s the same problem I have when I use newer MonoGame dev builds. I work on 3.6.0.187.

And many others.

I can’t say anything about that, I have no clue how the problem can be fixed. I can’t even build the Monogame source without getting the SharpDX exception for the base monogame shaders.

EDIT: Oh it seems there are some fixes, I need to try it out.

EDIT2: I reinstalled the newest monogame dev build but it still doesn’t work.

Thank you! The pictures look awesome!

Yesterday I fiddled around until I could load the sponza model in my little deferred rendering engine. I think some of the normals of the sponza model aren’t right, for example the ones of the floor. I vaguely remember correcting them in Blender, when I used it in my renderer.

So far I had no luck using the corrected version from the XNA 4.0 project, since it is in FBX format, but not the right one to use with Monogame. Unfortunately I could’t find the old *.blend file for re-exporting to a newer version of the FBX format.

It would be awesome to have a nice high quality test model like sponza, where loading is not so tedious.

My version works ok, it has some holes, but most of the normal stuff is good, I’m positive.

It’s .obj, but that’s not an issue obviously. The real issue is to have all the materials loaded, since the default monogame only loads diffuse.

Unfortunately I have troubles creating my own custom effects for importing since I can’t compile MonoGame source. It worked with an older version of the source, but I just stuck to the default for this one.